Last Updated on 6 months by Francis
Are you looking to cook the perfect steak on your infrared grill? Then look no further! In this comprehensive guide, we’ll walk you through the best infrared grill cooking times to achieve that perfect doneness. Whether you’re a seasoned griller or a beginner, we’ve got all the information you need to cook a mouthwatering steak that will impress your family and friends.
With the power of infrared grilling, you can achieve intense searing, resulting in tender and flavorful steaks. But cooking steak on an infrared grill requires some knowledge and skill. That’s why we’ve put together this guide to help you master the art of infrared grilling and cook the perfect steak every time.
Contents
Key Takeaways:
- Knowing the best infrared grill cooking times is crucial for achieving the perfect steak doneness.
- Properly preparing your steak with the right cut, seasoning, and marinating is essential for success.
- Preheating your infrared grill and determining steak doneness are important steps to achieving juicy and flavorful steaks.
- Each cut of steak requires a different cooking time to reach the desired doneness.
- Resting and slicing your steak properly is crucial for a tender and juicy result.
Understanding Infrared Grilling

If you’re new to infrared grilling or want to improve your skills, this section is for you. Infrared grilling is a unique cooking method that uses infrared radiation to heat the grill grates directly, resulting in faster and more even cooking. It’s a popular technique that many grillers prefer because it allows for high-heat searing, enhancing the flavor and texture of the meat.
When it comes to cooking steak on an infrared grill, there are a few key techniques that can take your cooking game to the next level. Here are some top tips to help you cook steak like a pro on an infrared grill:
- Get the temperature right: Infrared grills can get very hot very quickly, so it’s important to monitor the temperature closely. Aim for a temperature range of 600-700°F for the perfect sear.
- Use the right technique: To achieve that perfect sear, use the technique of “reverse searing.” This involves cooking the steak on a lower heat initially to reach the desired internal temperature before finishing it with a high-heat sear.
- Give it time: Just like any type of grilling, patience is key. Don’t rush the process and avoid constantly flipping the steak. Instead, let it cook on one side for a few minutes before flipping.
By following these tips and techniques, you’ll be on your way to grilling the perfect steak on your infrared grill.
“Infrared grilling is a unique cooking method that uses infrared radiation to heat the grill grates directly, resulting in faster and more even cooking.”
Preparing Your Steak

Optimizing your steak’s cooking time on an infrared grill starts with proper preparation. Follow these steps to ensure a mouth-watering result:
- Choosing the Right Steak Cut: Not all steaks are created equal, and some cuts may require different cooking times. Choose a cut that is between one and two inches thick to allow for proper searing without overcooking. Some excellent options include ribeye, T-bone, and New York strip.
- Seasoning: Season your steak with your preferred blend of spices, or keep it simple with salt and pepper. Apply the seasoning generously to both sides of the steak to enhance flavor.
- Marinating: Marinating your steak can help tenderize the meat and infuse it with additional flavor. Consider using a marinade that complements your seasoning blend or try something new for an exciting twist.
In addition to these tips, you may want to consider bringing your steak to room temperature before cooking to ensure even cooking. Doing so will prevent the outside of the steak from overcooking while the inside is still cold. Allow your steak to rest on the counter, covered, for at least 30 minutes before cooking.
By following these steps, you’ll be on your way to mastering the infrared grill steak cooking guide and achieving perfectly cooked steaks every time.
Preheating the Infrared Grill
Before placing your steaks on the grill, preheating is a crucial step to ensure even cooking and that perfect sear. The amount of time required for preheating your infrared grill will depend on the model you’re using. As a general rule of thumb, preheat your grill for 15-20 minutes before cooking steak. This will ensure that it reaches the ideal temperature of around 600-700°F.
It’s important not to rush the preheating process, as doing so can lead to undercooked or unevenly cooked steaks. Don’t be tempted to start grilling too soon, as this can result in a lack of flavor, tough texture, and unsatisfactory results.
While waiting for your grill to preheat, take the time to prepare your steaks for cooking. Season the steaks with your favorite seasoning mix or marinate them to enhance the flavor. Consider using a meat thermometer to monitor the temperature of your grill to ensure it stays at the optimal heat level for cooking steak.
Determining Steak Doneness

When grilling steak on an infrared grill, achieving the perfect doneness is key to getting that juicy, tender result. There are several ways to determine steak doneness, and we’ll discuss the most common methods below.
Using a Meat Thermometer
Using a meat thermometer is the most accurate way to check steak doneness. Simply insert the thermometer into the thickest part of the steak, making sure it doesn’t touch bone or fat. The temperature of the steak will correspond with the degree of doneness, as follows:
| Doneness | Temperature |
|---|---|
| Rare | 120°F – 130°F |
| Medium-rare | 130°F – 135°F |
| Medium | 135°F – 145°F |
| Medium-well | 145°F – 155°F |
| Well-done | 155°F – 165°F |
Note: It’s important to remove the steak from the grill a few degrees before the desired temperature, as the steak will continue to cook as it rests.
The Touch Test
If you don’t have a meat thermometer, you can use the touch test to estimate the doneness of your steak. Here’s a simple guide:
- Rare – Press the fleshy area at the base of your thumb with your index finger. The steak should feel soft and squishy, similar to the feel of rare steak.
- Medium-rare – Touch your middle finger to your thumb, then press the same fleshy area. The steak should feel slightly firmer, resembling the feel of medium-rare steak.
- Medium – Touch your ring finger to your thumb, then press the fleshy area. The steak should feel firm yet springy, similar to the feel of medium steak.
- Well-done – Touch your pinky finger to your thumb, then press the fleshy area. The steak should feel very firm, like well-done steak.
Recommended Cooking Times for Different Cuts of Steak

When it comes to cooking steak on an infrared grill, different cuts require different cooking times to achieve the perfect doneness. Refer to the table below for recommended cooking times for popular cuts of steak, based on an average thickness of one inch:
| Steak Cut | Doneness | Cooking Time (Per Side) |
|---|---|---|
| Ribeye | Rare | 3-4 minutes |
| Medium-Rare | 4-5 minutes | |
| Medium | 5-6 minutes | |
| Medium-Well | 6-7 minutes | |
| Well-Done | 7-8 minutes | |
| Filet Mignon | Rare | 2-3 minutes |
| Medium-Rare | 3-4 minutes | |
| Medium | 4-5 minutes | |
| Medium-Well | 5-6 minutes | |
| Well-Done | 6-7 minutes | |
| New York Strip | Rare | 3-4 minutes |
| Medium-Rare | 4-5 minutes | |
| Medium | 5-6 minutes | |
| Medium-Well | 6-7 minutes | |
| Well-Done | 7-8 minutes | |
| Sirloin | Rare | 3-4 minutes |
| Medium-Rare | 4-5 minutes | |
| Medium | 5-6 minutes | |
| Medium-Well | 6-7 minutes | |
| Well-Done | 7-8 minutes |
Keep in mind that these are general guidelines, and actual cooking times may vary depending on the thickness of your steak and personal preference for doneness. Use a meat thermometer or the touch test to ensure your steak is cooked to your liking.
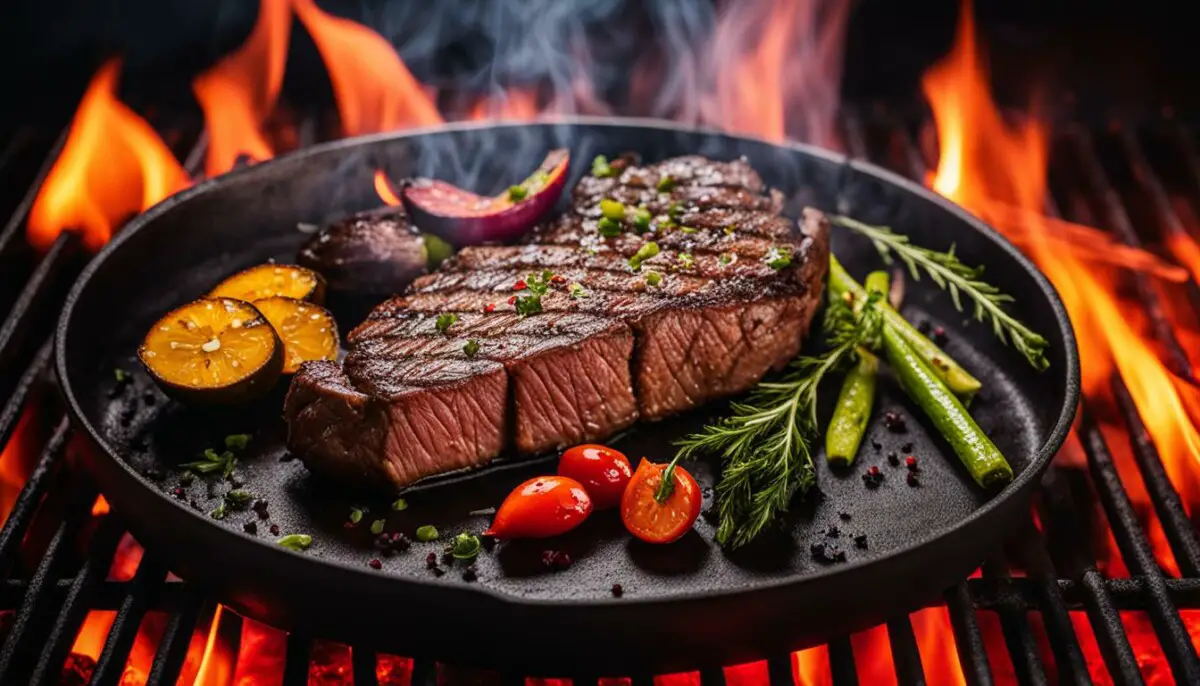
Searing and Grilling the Steak

Now that your infrared grill is preheated and your steak is properly prepared, it’s time to start cooking! Searing your steak is key to creating that mouthwatering crust, and the intense heat of the infrared grill makes it perfect for achieving just that.
Place your steak on the grill grates and let it sear for 2-3 minutes on each side, depending on thickness. To achieve those coveted grill marks, rotate the steak 45 degrees halfway through cooking on each side. For optimal results, don’t press down on the steak with a spatula or fork – this will release the juices and result in a dry steak.
After searing, adjust the heat to medium and continue grilling the steak until it reaches your desired internal temperature. Use a meat thermometer to check the temperature in the thickest part of the steak, making sure it’s cooked to your preference.
Expert tip: To add extra flavor to your steak, try basting it with melted butter and herbs during the grilling process.
Remember to keep an eye on your steak and adjust the heat as needed to avoid overcooking or undercooking. Once your steak has reached the perfect internal temperature, remove it from the grill and let it rest for a few minutes before slicing.
| Desired Doneness | Internal Temperature | Grilling Time (per side) |
|---|---|---|
| Rare | 120-125°F | 1-2 minutes |
| Medium-rare | 130-135°F | 2-3 minutes |
| Medium | 140-145°F | 3-4 minutes |
| Medium-well | 150-155°F | 4-5 minutes |
| Well-done | 160°F+ | 5-6 minutes |
Using these best infrared grill cooking times and techniques, you’ll be able to achieve that perfectly seared and juicy steak every time. Stay tuned for our next section on resting and slicing your steak!
Resting and Slicing Your Steak

After your steak has finished cooking, it’s crucial to let it rest before slicing into it. Resting allows the juices to redistribute throughout the meat, ensuring a tender and juicy steak. As a general rule of thumb, let your steak rest for about 5-10 minutes before slicing.
When it comes to slicing, make sure to cut against the grain. This means cutting perpendicular to the muscle fibers. Slicing against the grain will result in a more tender steak, as it cuts through the muscle fibers, making them easier to chew.
For a visually appealing presentation, slice your steak into ¼ inch thick pieces and fan them out on a platter. This will showcase the steak’s beautiful color and marbling.
Expert Tip: For added flavor, brush the steak with melted butter or olive oil right after slicing. This will give your steak a delicious, rich flavor and add a beautiful shine to it.
Troubleshooting Common Issues

Even with the best guidelines, sometimes issues may arise during the cooking process. Here are some common problems encountered when cooking steak on an infrared grill and how to solve them:
“My steak is overcooked.”
If your steak is overcooked, it means you cooked it for too long. To prevent overcooking, use a meat thermometer to check the temperature of your steak regularly. Remove it from the grill when it reaches your desired level of doneness, and let it rest for a few minutes before serving.
“My steak is undercooked.”
If your steak is undercooked, it means you didn’t cook it for long enough. To ensure your steak is cooked to your liking, use a meat thermometer to check the temperature regularly. If it’s not ready yet, put it back on the grill until it reaches the desired internal temperature.
“My steak is unevenly cooked.”
This issue can occur if you’re using a grill with uneven heat distribution. To solve this problem, consider upgrading to a higher-quality infrared grill. Make sure to preheat your grill evenly, and use a meat thermometer to check the temperature of each part of the steak before removing from the grill.
“My steak is dry.”
If your steak is dry, it may be due to overcooking or not allowing it to rest before slicing. To prevent dryness, remove the steak from the grill at the right internal temperature, and let it rest for 5-10 minutes to allow the juices to redistribute. Additionally, consider marinating your steak beforehand to add moisture and flavor.
By following the steps outlined in this infrared grill steak cooking guide, you can avoid these common issues and achieve perfectly cooked steaks every time. Happy grilling!
Tips and Tricks for Grilling Like a Pro
If you want to take your steak-cooking skills to the next level, try implementing these tips and tricks:
- Choose high-quality meat: Start with a good quality cut of steak. Look for steaks with visible marbling and a bright red color.
- Allow the steak to come to room temperature: Take the steak out of the refrigerator at least 30 minutes before cooking to ensure even cooking.
- Experiment with different seasonings: Don’t be afraid to try different seasonings, rubs, and marinades to add flavor to your steak.
- Invest in a meat thermometer: A meat thermometer is essential for checking the internal temperature of your steak and ensuring it’s cooked to your desired doneness.
- Don’t flip the steak too often: Resist the urge to constantly flip your steak. Let it cook on one side for a few minutes to develop a crust before flipping.
- Use a clean and oiled grill: Make sure your grill grates are clean and oiled before cooking to prevent sticking and ensure even cooking.
- Let the steak rest: After cooking, let your steak rest for at least 5 minutes before slicing to allow the juices to redistribute and ensure a tender result.
With these tips and tricks, you’re on your way to grilling like a pro on your infrared grill. Don’t be afraid to experiment and find your own personal style for cooking the perfect steak.
Conclusion
Congratulations, you’ve made it to the end of our comprehensive guide on how long to cook steak on an infrared grill! We hope that this guide has provided you with valuable knowledge and techniques to achieve perfectly cooked steaks every time.
Remember, mastering the art of cooking steak on an infrared grill takes practice, so don’t be discouraged if your first few attempts don’t turn out as expected. Keep experimenting with different cooking times, cuts of steak, and flavor profiles to find your perfect combination.
Happy Grilling!
We hope that you’ve found our tips and tricks helpful, and that you’re ready to embrace the power of infrared grilling to enjoy mouthwatering, juicy steaks. Whether you’re a beginner or a seasoned griller, keep our guide handy as a reference to ensure success every time you fire up your infrared grill.
Thank you for reading, and we wish you all the best on your grilling adventures!
FAQ
How long should I cook a steak on an infrared grill?
The cooking time will vary depending on the thickness of the steak and your desired level of doneness. As a general guide, a 1-inch thick steak cooked on high heat will take approximately 4-6 minutes per side for medium-rare. It’s always best to use a meat thermometer to ensure the steak reaches the desired internal temperature.
Can I use marinades on steaks cooked on an infrared grill?
Yes, you can use marinades to add flavor to your steak. However, be cautious of marinades that contain a lot of sugar or oil, as they can cause flare-ups on the grill. It’s best to lightly pat the steak dry before placing it on the infrared grill to avoid excessive smoke or charring.
How do I achieve those iconic grill marks on my steak?
To achieve grill marks on your steak, preheat the grill to high heat and place the steak diagonally on the grates. After a couple of minutes, rotate the steak 90 degrees to create the crosshatch pattern. Continue cooking until desired doneness is reached, occasionally flipping the steak to ensure even cooking.
How should I season my steak before cooking it on an infrared grill?
Seasoning your steak with salt and pepper is a classic approach that brings out the natural flavors. You can also experiment with different rubs and marinades to enhance the taste. Just remember to season the steak with salt at least 40 minutes before cooking to allow the seasoning to penetrate the meat.
Should I let my steak rest after cooking on an infrared grill?
Yes, allowing your steak to rest after cooking is crucial for optimal flavor and tenderness. Resting the steak for about 5-10 minutes allows the juices to redistribute, resulting in a more flavorful and juicy steak. Cover the steak loosely with aluminum foil to keep it warm during the resting period.
How do I know when my steak is cooked to my desired doneness?
The best way to determine the doneness of your steak is by using a meat thermometer. For rare steak, aim for an internal temperature of 125°F (52°C). For medium-rare, aim for 135°F (57°C). Medium steak should reach an internal temperature of 145°F (63°C), while medium-well is around 150°F (66°C), and well-done is 160°F (71°C). Alternatively, you can use the touch test to gauge the doneness.