Last Updated on 5 months by Francis
Are you looking to cook a delectable turkey in an infrared fryer but unsure about the exact cooking time? Well, you’ve come to the right place. In this guide, we’ll cover everything you need to know about cooking a turkey in an infrared fryer, including the best cooking time, preparation, and cooking techniques.
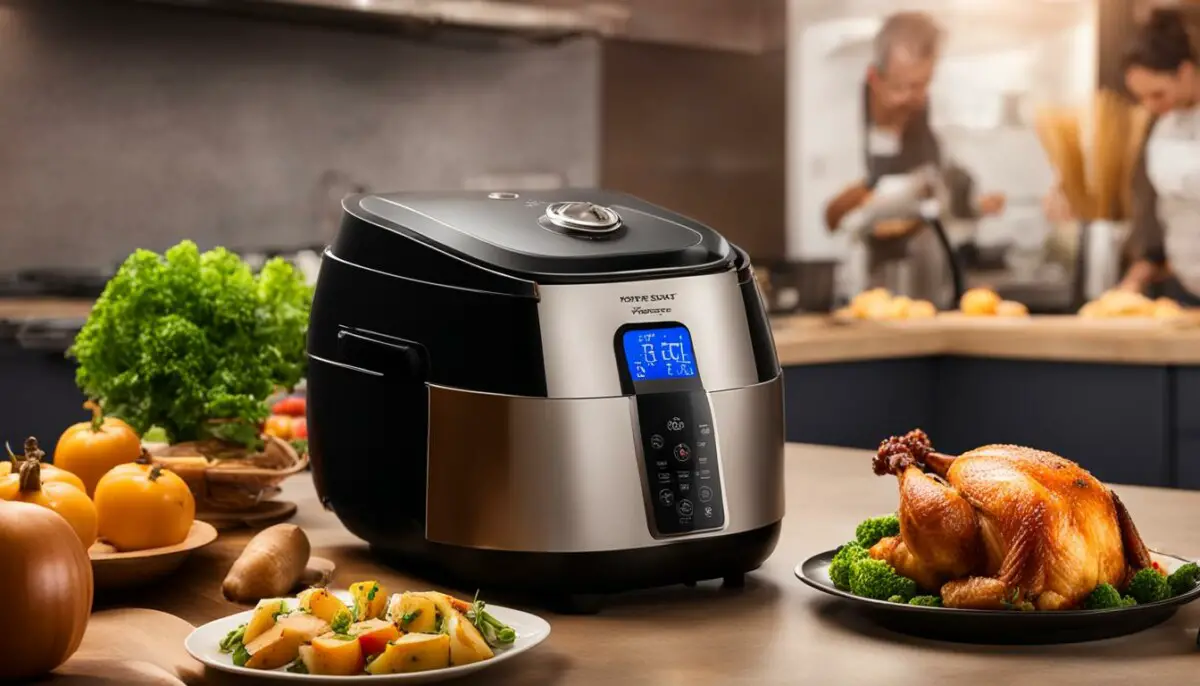
Infrared fryers are an excellent option for cooking turkey as they cook faster and more evenly than traditional methods. The intense heat of the infrared rays cooks the turkey from the inside, resulting in a beautifully crisp and juicy bird.
Now, let’s delve into the optimal cooking time for turkey in an infrared fryer to ensure your next feast is a success.
Contents
Key Takeaways
- Using an infrared fryer for cooking turkey results in a faster and more even cook
- The intense heat of the infrared rays cooks the turkey from the inside out
- Exact cooking time for turkey in an infrared fryer is essential to achieve a crisp and juicy bird
- Proper preparation and seasoning of the turkey before cooking is necessary
- Monitoring and basting the turkey during cooking ensures even cooking and enhanced flavor
Why Choose an Infrared Fryer for Cooking Turkey

When it comes to cooking a turkey, there are many methods to choose from. However, an infrared fryer is an excellent choice for achieving a deliciously cooked turkey every time. Here are some of the reasons why:
- Quick Cooking Time: Using an infrared fryer drastically reduces the cooking time of your turkey. In fact, you can cook a 14-pound turkey in just 50 minutes! This is because the infrared technology heats the turkey from the inside out, resulting in a faster cooking process.
- Juicy and Tender Results: Because the infrared fryer cooks the turkey quickly and evenly, it helps to seal in the juices and flavors, resulting in a tender and juicy turkey.
- No Need for Oil: Unlike traditional fryers, an infrared fryer does not require oil to cook the turkey. This means that your turkey will be healthier and lower in calories.
Overall, an infrared fryer is a great option for those who want a quick, easy, and delicious way to cook their turkey. With the best cooking time for turkey in infrared fryer in mind, you can enjoy a perfectly cooked turkey that will be the highlight of your holiday meal.
Preparing and Seasoning the Turkey for Infrared Fryer Cooking

Before cooking the turkey in the infrared fryer, it is crucial to prepare and season it properly. Follow these steps for a flavorful and tender turkey:
- Clean the turkey thoroughly by removing the giblets and other organs from the cavity. Rinse the turkey under cold water and pat it dry with paper towels.
- Season the turkey with your desired herbs and spices. For best results, try a rub that includes salt, pepper, garlic powder, and paprika.
- For added flavor, inject the turkey with a marinade using a meat injector. This will help keep the turkey moist during cooking.
Once the turkey is seasoned and prepared, it is time to place it in the infrared fryer. Follow the recommended cooking time based on the weight of your turkey, as shown in the table below:
| Turkey Weight | Cooking Time |
|---|---|
| 10-12 pounds | 40-50 minutes |
| 12-14 pounds | 50-60 minutes |
| 14-16 pounds | 60-70 minutes |
| 16-18 pounds | 70-80 minutes |
It is important to note that these are recommended cooking times and may vary based on your particular model of infrared fryer. Always refer to the manufacturer’s instructions before cooking.
Next, learn how to set up and preheat your infrared fryer for the perfect cooking temperature with our helpful guide in the next section.
Setting Up and Preheating the Infrared Fryer

Before cooking your turkey in the infrared fryer, it’s important to properly set up and preheat the appliance. This will ensure that your turkey is cooked evenly and to perfection. Follow these steps for the perfect turkey cooking time in infrared fryer:
Gather Your Equipment
First, make sure you have all the necessary equipment, including the infrared fryer, a meat thermometer, and a timer. Make sure your turkey is completely thawed and cleaned before cooking.
Preheat the Infrared Fryer
Preheat the infrared fryer to 375°F. This is the recommended temperature for cooking turkey in the infrared fryer. Allow the fryer to preheat for at least 10 minutes before adding your turkey.
Refer to the Turkey Cooking Time Chart for Infrared Fryer
Refer to the turkey cooking time chart for infrared fryer to determine the perfect cooking time based on the weight of your turkey. This will ensure that your turkey is cooked thoroughly and to the correct temperature. The chart below provides a general guide for turkey cooking times:
| Turkey Weight | Cooking Time |
|---|---|
| Up to 14 lbs | 10-12 minutes per pound |
| 14-18 lbs | 12-15 minutes per pound |
| 18-20 lbs | 15-18 minutes per pound |
| 20-22 lbs | 18-20 minutes per pound |
| 22-24 lbs | 20-22 minutes per pound |
Remember that these cooking times are only a guide. Always use a meat thermometer to ensure the turkey has reached an internal temperature of 165°F.
Make sure to preheat your infrared fryer and use the turkey cooking time chart for infrared fryer for the perfect turkey cooking time in infrared fryer. Remember to use a meat thermometer to check the internal temperature before serving.
Cooking the Turkey in the Infrared Fryer

Now that your turkey is prepped and your infrared fryer is preheated, it’s time to begin the cooking process. Place the turkey in the fryer basket, breast side up. Make sure there is enough room for the turkey so that it cooks evenly.
Cook the turkey for approximately 7-10 minutes per pound, or until the internal temperature reaches 165°F. Use the cooking chart below as a guideline for the recommended cooking time based on the weight of your turkey:
| Turkey Weight (in pounds) | Cooking Time (in minutes) |
|---|---|
| 8-10 | 70-90 |
| 10-12 | 90-120 |
| 12-14 | 120-140 |
| 14-18 | 140-180 |
During the cooking process, use a meat thermometer to monitor the internal temperature of the turkey. Check the temperature in the thickest part of the turkey, making sure to avoid hitting the bone. This will ensure that the turkey is cooked thoroughly and is safe to eat.
For the best results, baste the turkey with oil or butter every 30 minutes. This will help to keep the turkey moist and flavorful throughout the cooking process.
Once the cooking time is complete, turn off the infrared fryer and carefully remove the turkey from the basket. Allow the turkey to rest for at least 15-20 minutes before carving. This will allow the juices to settle and the turkey to remain tender and juicy.
Now that you know how long to cook turkey in infrared fryer, it’s time to enjoy your perfectly cooked and juicy turkey. Follow these steps for a delicious and stress-free holiday meal. Happy cooking!
Monitoring and Basting the Turkey During Cooking

During the cooking process, it’s essential to monitor and baste the turkey regularly to ensure even cooking and prevent dryness. Open the infrared fryer lid briefly to baste the turkey with melted butter or oil using a basting brush. This will help the skin become crisp and golden while keeping the meat moist.
Use a meat thermometer to check the internal temperature of the turkey periodically. Insert the thermometer into the thickest part of the turkey’s thigh, making sure it doesn’t touch the bone. The turkey is done when the internal temperature reaches 165°F. Check the temperature every hour to avoid overcooking or undercooking the turkey.
If you notice that the skin is browning too quickly, cover it with aluminum foil. This will prevent it from burning while allowing the turkey to continue cooking. Be sure to remove the foil during the last 30 minutes of cooking to brown the skin to a perfect crisp.
Remember to add extra basting liquid or oil to the drip pan if it evaporates during cooking. This will keep the turkey moist and flavorful while preventing the drippings from burning.
Testing the Turkey for Doneness

After cooking the turkey for the recommended cooking time in the infrared fryer, it’s crucial to test it for doneness to ensure that it’s safe to eat. The best way to do this is by using a meat thermometer. Insert the thermometer into the thickest part of the turkey, making sure not to touch the bone, and wait for the temperature to stabilize.
The recommended temperature for a fully cooked turkey is 165°F (74°C). If the thermometer reads this temperature or higher, the turkey is ready to be removed from the infrared fryer and served.
It’s important to note that different parts of the turkey may cook at different rates, and the temperature can vary, depending on where the thermometer is inserted. To ensure that the entire turkey is thoroughly cooked, check the temperature in multiple places, such as the thigh, breast, and wing.
Tip:
If the turkey is not yet fully cooked, return it to the infrared fryer for a few more minutes and continue to check the temperature until it reaches 165°F (74°C). Make sure not to overcook the turkey, as this can lead to dry and tough meat.
Resting and Carving the Turkey
After removing the turkey from the infrared fryer, the next step is to allow it to rest for approximately 20 minutes. This will give the juices time to redistribute and be absorbed, resulting in a tender and juicy meat.
While the turkey is resting, you can prepare your carving station. Use a sharp carving knife and a cutting board large enough to hold the turkey. Place a piece of parchment paper or a carving mat on the cutting board to prevent the turkey from slipping.
Begin by removing the legs and wings of the turkey from the body. Use a sharp knife to cut through the joint and separate it from the body. Then, cut through the breastbone to separate the breast meat from the rest of the turkey. Once you have carved the breast meat, slice the dark meat from the legs and wings.
Arrange the carved meat on a platter or serving dish and garnish with your favorite herbs or fruits. Don’t forget to serve the delicious juices that have collected in the pan!
Pro Tip: To ensure perfect turkey cooking time in infrared fryer, consider investing in a meat thermometer. This will help you monitor the internal temperature of the turkey and ensure it is cooked to perfection.
Now that you know how to cook a turkey in an infrared fryer, it’s time to put your knowledge to the test. With the right preparation, timing, and techniques, you can enjoy a perfectly cooked and juicy turkey that is sure to impress your guests.
Conclusion
Now that you know the optimal cooking time for turkey in an infrared fryer, as well as the benefits of using this cooking method, you are well on your way to impressing your guests with a delicious, juicy turkey.
Remember, preparation is key, so make sure to properly season and prepare your turkey before cooking. Use our turkey cooking time chart to determine the perfect cooking time based on your bird’s weight.
During the cooking process, monitor and baste the turkey regularly to ensure even cooking and maximum flavor. And don’t forget to test the turkey for doneness before serving.
Finally, rest and carve the turkey properly to ensure a beautifully presented and succulent final product.
With these tips and techniques, you can confidently cook a perfect turkey in your infrared fryer. So go ahead, impress your family and friends with your newfound cooking skills.
FAQ
How long should I cook a turkey in an infrared fryer?
The cook time for a turkey in an infrared fryer depends on the weight of the bird. As a general guideline, cook the turkey for approximately 7 minutes per pound at a temperature of 325°F. Use a meat thermometer to ensure the internal temperature reaches 165°F for a fully cooked turkey.
Why should I choose an infrared fryer for cooking turkey?
An infrared fryer offers several benefits for cooking turkey. It cooks the turkey more evenly, resulting in a juicy and tender bird. Additionally, the infrared heat seals in the natural juices, providing a flavorful and crispy skin on the outside. The shorter cook time in an infrared fryer also saves you valuable time in the kitchen.
How should I prepare and season the turkey for infrared fryer cooking?
Before cooking the turkey in an infrared fryer, make sure to remove the giblets and rinse the bird thoroughly. Pat it dry with paper towels and season it with your preferred spices and herbs. You can also inject marinades or brines for added flavor. Allow the seasoned turkey to sit at room temperature for 30 minutes before placing it in the fryer.
How do I set up and preheat the infrared fryer?
To set up the infrared fryer, ensure it is on a stable and level surface. Add the required amount of oil to the fryer and attach a thermometer to monitor the temperature. Preheat the fryer to 375°F before adding the turkey. Refer to a turkey cooking time chart to determine the ideal cooking time based on the weight of your turkey.
What is the process for cooking the turkey in the infrared fryer?
Once the infrared fryer is preheated, carefully lower the turkey into the hot oil using the provided hooks or basket. Cook the turkey according to the recommended cooking time, checking the internal temperature with a meat thermometer to ensure it reaches 165°F. Remember to follow the manufacturer’s instructions for your specific fryer model.
Should I monitor and baste the turkey during cooking?
Yes, it is important to monitor and baste the turkey throughout the cooking process. Every 30 minutes, open the fryer and use a spoon or baster to collect the hot oil and drizzle it over the turkey. This helps to keep the turkey moist and enhances the flavor. Be cautious when opening the fryer to avoid any hot oil splatters.
How can I test the turkey for doneness?
To test the turkey for doneness, insert a meat thermometer into the thickest part of the thigh without touching the bone. The internal temperature should reach 165°F. If the thermometer reads below this temperature, continue cooking the turkey until it reaches the safe internal temperature. Remember to let the turkey rest for 15-20 minutes before carving.
How do I properly rest and carve the turkey after cooking?
After removing the turkey from the infrared fryer, let it rest on a cutting board or platter for 15-20 minutes. This allows the juices to redistribute, resulting in a moist and flavorful turkey. To carve the turkey, begin by removing the legs and wings, followed by slicing the breast meat against the grain. Serve the carved turkey on a serving platter.
What are the key takeaways for cooking turkey in an infrared fryer?
In conclusion, cooking a turkey in an infrared fryer requires careful preparation, monitoring, and timing. Follow the recommended cooking times and techniques discussed in this guide to achieve a delicious and perfectly cooked turkey. Always prioritize safety by using a meat thermometer to ensure the turkey reaches an internal temperature of 165°F.