Last Updated on 5 months by Francis
Building your own infrared sauna at home is a rewarding and cost-effective project that allows you to enjoy the therapeutic benefits of infrared light therapy. Infrared saunas use bulbs that emit infrared and red light to warm your body directly, providing deep tissue penetration and various health benefits. By following this step-by-step guide, you can create a customized infrared sauna in the comfort of your own home.
Contents
Key Takeaways:
- Learn how to build your own infrared sauna using this comprehensive guide
- Enjoy the convenience and cost-effectiveness of having an infrared sauna at home
- Experience the numerous health benefits of infrared light therapy
- Customize your sauna to suit your preferences and needs
- Ensure proper construction and electrical work for a safe and efficient sauna
How Your Home Infrared Sauna Works

Infrared saunas provide a unique and effective way to experience the benefits of light therapy. Unlike traditional saunas, which heat the air in a small room, infrared saunas use specially designed bulbs to emit infrared and red light. This light penetrates your skin and delivers gentle warmth deep into your tissue and bones. This innovative heating method allows you to experience the therapeutic effects of heat without the intense humidity of traditional saunas.
Building a home infrared sauna requires careful construction and the use of specific materials. The construction process involves creating a small, enclosed room and installing the infrared bulbs in strategic locations. The materials used should be suitable for sauna environments and ensure the sauna functions effectively and safely. By following a step-by-step guide and using quality materials, you can create your own personalized infrared sauna right in the comfort of your own home.
Investing in the construction of a home infrared sauna allows you to enjoy the various health benefits it offers. Infrared light therapy has been shown to improve circulation, promote relaxation, and help alleviate muscle pain and stiffness. By understanding how your home infrared sauna works and carefully planning the construction process, you can create a personalized oasis of wellness that fits your needs and enhances your well-being.
Let’s delve deeper into the construction and materials required to build your own home infrared sauna:
Table: Infrared Sauna Materials
| Materials | Description |
|---|---|
| 2x4s | Sturdy lumber for framing the sauna walls |
| Formaldehyde-free plywood | Environmentally friendly material for the sauna walls |
| Infrared light bulbs | Bulbs that emit infrared and red light for therapeutic heating |
| Clamp lamps | Lamps used to secure the infrared bulbs in place |
| Velcro cable ties | Fasteners for organizing and securing electrical cables |
| Eye protection | Goggles or glasses to shield your eyes from intense light |
| GFCI outlets | Ground Fault Circuit Interrupter outlets for electrical safety |
| Circuit breakers | Protective devices that automatically shut off power in case of electrical overloads |
What You’ll Need to Build Your Upgraded NIR Sauna

Building your own upgraded NIR sauna requires a variety of products and materials. By gathering all the necessary supplies, you’ll be well-prepared to construct an efficient and functional infrared sauna in the comfort of your own home.
Materials
- 2x4s for framing
- Formaldehyde-free plywood for the walls
- R19 insulation for heat retention
- Electrical components: GFCI outlets, circuit breakers
- Optional hot tub timer switches for controlling power
Lighting
The key component of an infrared sauna is the lighting system that emits infrared and red light. To build your upgraded NIR sauna, you’ll need:
- Infrared light bulbs
- Clamp lamps to hold the bulbs
Additional Items
In addition to the essential materials and lighting, there are a few other items you’ll need for a successful sauna build:
- Stand to hold the clamp lamps
- Power strips for connecting electrical components
- Velcro cable ties for cable management
- Eye protection for safety
By ensuring you have all the necessary supplies, you’ll be well on your way to building your very own upgraded NIR sauna. With the right materials and lighting, you can create a personalized sauna experience in the comfort of your home.
Table: Materials and Equipment
| Materials | Lighting | Additional Items |
|---|---|---|
| 2x4s for framing | Infrared light bulbs | Stand to hold the clamp lamps |
| Formaldehyde-free plywood for the walls | Clamp lamps to hold the bulbs | Power strips for connecting electrical components |
| R19 insulation for heat retention | Velcro cable ties for cable management | |
| Electrical components: GFCI outlets, circuit breakers | Eye protection for safety | |
| Optional hot tub timer switches for controlling power |
Choosing a Location for Your Infrared Sauna
When it comes to building your own infrared sauna, choosing the right location is essential for creating a relaxing and effective sauna experience. You’ll need a space that can accommodate the sauna and provide the necessary electrical requirements for its operation. Here are some factors to consider when determining where to build your infrared sauna:
- Available Space: Look for a smaller enclosed area in your home, such as an unused closet, extra bathroom, or walk-in closet. These spaces provide a cozy and intimate environment for your sauna sessions.
- Electrical Requirements: Ensure that the chosen location has access to dedicated electrical circuits. Running two 20-amp dedicated circuits is recommended to power the sauna effectively and safely.
- Privacy and Convenience: Consider the convenience and privacy of the chosen location. You’ll want a space that is easily accessible, secluded, and allows for a peaceful sauna experience.
By carefully selecting the location for your infrared sauna, you can create a dedicated space in your home that promotes relaxation, wellness, and rejuvenation.
Table 4: Pros and Cons of Different Infrared Sauna Locations
| Location | Pros | Cons |
|---|---|---|
| Unused Closet | – Cozy and intimate atmosphere – Easy to convert into a sauna – Privacy |
– Limited space – May require additional electrical work |
| Extra Bathroom | – Dedicated space for sauna – Easy access to amenities and plumbing |
– Limited availability if shared bathroom – May require structural modifications |
| Walk-in Closet | – Sufficient space for a small sauna – Often secluded and private |
– May require modifications for proper ventilation – Limited flexibility in layout |
Take into account the pros and cons of each location option to find the one that best fits your needs and preferences. Remember to consult an electrician to ensure proper electrical wiring and safety precautions are taken. With the right location, you’ll be able to enjoy the full benefits of your own personal infrared sauna right in the comfort of your home.
How Large Should I Build My Infrared Sauna?
When it comes to building your own infrared sauna, determining the right size is crucial for optimal efficiency and comfort. The size of your sauna will depend on various factors, including the available space and the number of users you plan to accommodate.
For efficient heating and comfortable sauna sessions, a room measuring around 5’x5′ is considered ideal. This size allows the infrared bulbs to heat up the space quickly and evenly, ensuring a consistent and effective sauna experience. Additionally, a smaller sauna allows users to sit closer to the bulbs, maximizing the therapeutic benefits of the infrared light.
However, if you have more space available and want to accommodate multiple users or include additional amenities, you can consider building a larger sauna. Keep in mind that larger saunas may require more time to heat up and may have slightly less intense heat compared to smaller ones.
| Size | Benefits | Considerations |
|---|---|---|
| 5’x5′ | – Efficient heating – Closer proximity to bulbs – Cost-effective |
– Limited space – Suitable for individuals or couples |
| Larger than 5’x5′ | – Accommodates more users – Space for additional amenities |
– Longer heating time – Slightly less intense heat |
Ultimately, the size of your infrared sauna should be chosen based on your specific needs and available space. Whether you opt for a compact sauna or a larger one, building your own infrared sauna allows you to enjoy the therapeutic benefits of infrared light therapy in the comfort of your own home.
Building Your Infrared Sauna

Once you have gathered all the necessary materials, it’s time to start building your own infrared sauna. Follow this step-by-step guide to ensure a successful construction process.
- Step 1: Framing the Sauna
- Step 2: Insulating the Sauna
- Step 3: Installing the Bulbs
- Step 4: Electrical Setup
Begin by framing the small room for your sauna using 2x4s. Make sure to leave space for the door and any additional amenities you plan to include, such as shelves. Secure the frame to the floor and walls, ensuring stability.
Next, insulate the walls of your sauna using R19 insulation. This will help retain heat and create a more comfortable sauna experience. Install the insulation between the frames, covering the entire interior of the sauna.
Now it’s time to install the infrared bulbs. Mount the NIR lamps on two sides of your sauna using either a shoe rack or 2x4s. Ensure that the bulbs are positioned at an appropriate height and angle for optimal heat distribution and user comfort.
Proper electrical work is crucial for the safe operation of your sauna. Install dedicated circuits and outlets for the sauna, following local regulations and consulting a licensed electrician if necessary. Consider using a hot tub timer switch to control the power to the lamps.
Additional Amenities
To enhance your sauna experience, you can add extra amenities such as shelves for towels and essential oils. These amenities can be customized to suit your preferences and create a more relaxing environment.
Remember to prioritize safety throughout the construction process and consult professionals if needed. With careful planning and attention to detail, you can create your very own DIY infrared sauna and enjoy the benefits of infrared light therapy in the comfort of your own home.
How to Wire Your Infrared Sauna

Proper wiring is crucial for the safe and effective operation of your infrared sauna. When it comes to infrared sauna electrical wiring, it is highly recommended to consult a licensed electrician and follow local regulations. Here are some important steps to consider when wiring your sauna:
- Install dedicated 20-amp GFCI outlets: GFCI (Ground Fault Circuit Interrupter) outlets are designed to protect against electrical shock and provide a safer environment. These outlets should be installed specifically for the sauna to ensure proper electrical wiring.
- Use circuit breakers for added protection: Circuit breakers are essential for preventing overloading and short circuits. Make sure to install circuit breakers that match the electrical requirements of your sauna.
- Use conduit as needed: Conduit is a protective covering for electrical wires and cables. It helps prevent damage and provides a neat and organized appearance. Use conduit when necessary to protect the wiring in your sauna.
- Consider installing hot tub timer switches: Hot tub timer switches can be a convenient addition to your sauna’s electrical setup. They allow you to control the power to the infrared lamps, ensuring efficient energy usage and easier management of sauna sessions.
Remember, safety should always be the top priority when it comes to wiring your infrared sauna. It is essential to follow electrical safety guidelines, consult professionals, and ensure that all wiring is done correctly to avoid any potential hazards.
Quote:
“Proper wiring is essential for the safe and effective operation of your infrared sauna.”
By following these guidelines and seeking professional advice, you can wire your infrared sauna properly and enjoy its therapeutic benefits with peace of mind.
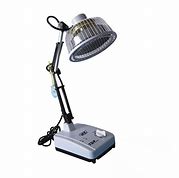
Getting the Best Quality Infrared Sauna Bulbs
When it comes to building your own infrared sauna, selecting high-quality bulbs is essential for optimal results and a satisfying sauna experience. TheraBulb is a trusted brand that offers a range of certified near infrared bulbs, specifically designed for use in saunas. Their bulbs emit wavelengths between 400nm and 1000nm, which includes both red light and near infrared. By using TheraBulb infrared bulbs, you can ensure that your sauna sessions are effective and deliver the desired health benefits.
TheraBulb infrared bulbs are carefully manufactured to meet strict quality standards. They are free of toxic materials like lead and mercury, making them safe for use in your sauna. The bulbs are designed to provide optimal heat distribution and penetration, helping to promote relaxation, improve circulation, and alleviate muscle soreness. With TheraBulb, you can trust that you are investing in top-of-the-line quality for your infrared sauna.
Using TheraBulb infrared bulbs in your sauna also ensures consistent performance and longevity. These bulbs are built to last, offering a reliable and durable lighting solution for your sauna. With their high-quality construction, TheraBulb bulbs provide a consistent output of infrared and red light, ensuring that you can enjoy the full benefits of infrared therapy with every sauna session.
Benefits of TheraBulb Infrared Bulbs:
- High-quality construction for reliable performance
- Free of toxic materials like lead and mercury
- Optimal heat distribution and penetration for effective therapy
- Long-lasting durability for years of use
When building your own infrared sauna, don’t compromise on the quality of the bulbs. TheraBulb infrared bulbs provide the perfect combination of safety, performance, and longevity, ensuring that your sauna experience is both effective and enjoyable. Upgrade your sauna with TheraBulb infrared bulbs and start reaping the benefits of infrared light therapy in the comfort of your own home.
Conclusion
Building your own infrared sauna is a rewarding and cost-effective way to enjoy the therapeutic benefits of infrared light therapy in the comfort of your own home. By following the step-by-step guide provided in this article and using the recommended materials and bulbs, you can create a customized sauna that suits your needs.
It is important to prioritize safety throughout the construction process. Consult professionals when needed, such as licensed electricians, to ensure proper wiring and electrical work. Additionally, always adhere to local regulations and guidelines to ensure the sauna functions effectively and safely.
With your DIY infrared sauna complete, you’ll enter a world of relaxation and wellness. Indulge in the numerous health benefits that infrared light therapy has to offer, including improved circulation, detoxification, pain relief, and relaxation. Take time to unwind and enjoy the soothing warmth of your own personal sauna oasis.
FAQ
What are the benefits of building your own infrared sauna at home?
Building your own infrared sauna at home allows you to enjoy the therapeutic benefits of infrared light therapy at a lower cost.
How does an infrared sauna differ from a traditional sauna?
Unlike traditional saunas, infrared saunas use bulbs that emit infrared and red light to directly warm your body, providing deep tissue penetration and various health benefits.
What materials and products do I need to build an infrared sauna?
You will need infrared light bulbs, clamp lamps, a stand, power strips, Velcro cable ties, eye protection, construction materials like 2x4s and formaldehyde-free plywood, electrical components like GFCI outlets and circuit breakers, and optional hot tub timer switches.
Where should I place my infrared sauna in my home?
It is recommended to choose a smaller enclosed space like an unused closet, extra bathroom, or walk-in closet that can accommodate the sauna and run dedicated electrical circuits.
What size should I build my infrared sauna?
Consider factors like efficiency and comfort when determining the size of your infrared sauna. A room measuring around 5’x5′ is ideal for efficient heating and comfortable sauna sessions.
How do I wire my infrared sauna?
Proper wiring is essential for the safe and effective operation of your infrared sauna. Consult a licensed electrician and follow local regulations. You will need to install dedicated 20-amp GFCI outlets and circuit breakers, use conduit as needed, and optionally install hot tub timer switches.
What kind of bulbs should I use in my infrared sauna?
Look for bulbs that emit wavelengths between 400nm and 1000nm, encompassing red light and near infrared. Choose bulbs that are free of toxic materials like lead and mercury. TheraBulb offers certified near infrared bulbs that provide optimal results.


.jpg "Can you use dimmable led light bulbs in a regular socket")