Last Updated on 3 months by Francis
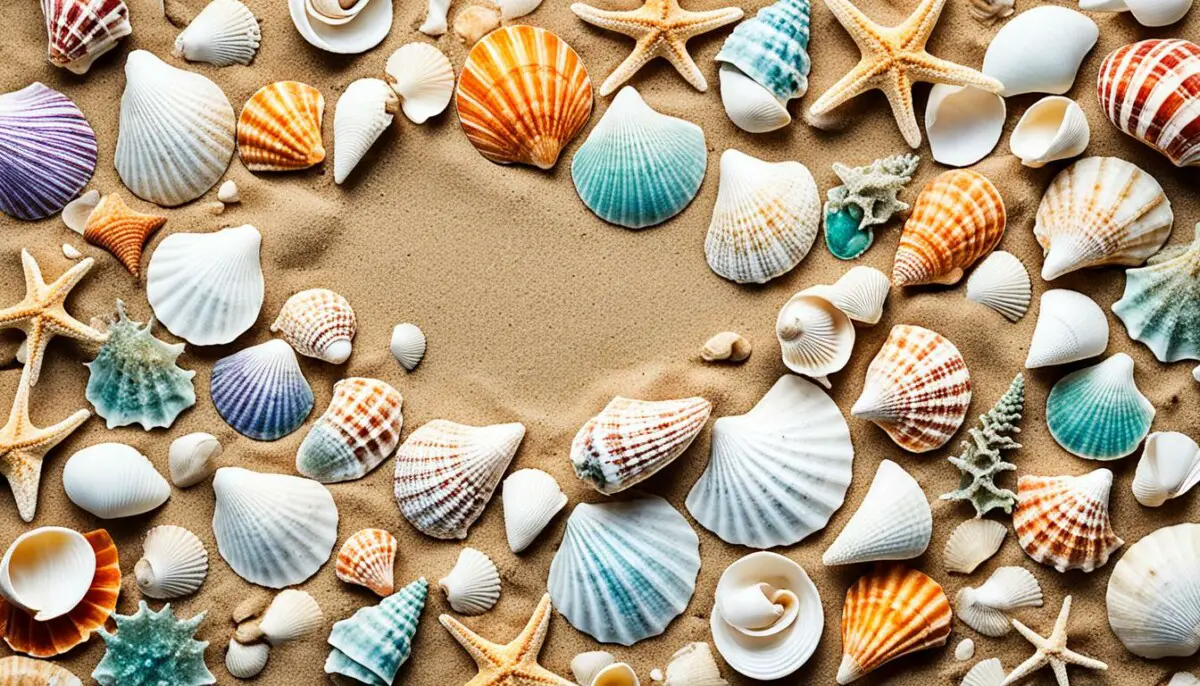
Are you looking for quick and easy ways to turn your favorite sea shells into something memorable? Check out these 25+ DIY sea shell crafts! In this article, we’re sharing 25 DIY seashell crafts featuring creative ways to put those beautiful shells to use. From simple projects like seashell wreaths to more intricate ones like stunning shell windchimes, there’s something here for everyone.
Contents
Key Takeaways:
- Get inspired by these 25+ seashell craft ideas to create beautiful DIY projects.
- Seashell crafts are a great way to add a beachy touch to your home decor.
- From shadow box seashell art to oyster shell jewelry dishes, there’s a project for every skill level.
- Enjoy the process of crafting with seashells and let your creativity shine.
- Gather your favorite shells and embark on your own DIY seashell crafts today!
Seashell Crafts

Sea shell crafts are a popular choice for DIY enthusiasts of all ages, offering a creative outlet to transform the beauty of beach vacations into unique coastal crafts. With shells easy to find in coastal areas and on beaches, you can easily gather the necessary materials for your seashell crafts. Whether you’re a seasoned crafter or a beginner looking to explore your creative side, seashell crafts provide endless possibilities.
Crafting with seashells allows you to bring the beach vibe into your home decor. By incorporating shells into various projects, you can add a touch of the coast to every room. From seashell wreaths adorning your front door to intricate shell windchimes gently chiming in the breeze, the possibilities are limitless.
One of the advantages of seashell crafts is that they require limited craft supplies, making it an affordable and accessible hobby for everyone to enjoy. All you need are some basic crafting materials like glue, paint, and a little imagination to create beautiful beach-inspired creations.
Benefits of Seashell Crafts:
- Provides a creative outlet for all ages
- Brings the beauty of the beach into your home decor
- Requires minimal craft supplies
- Offers a wide range of project options
- Allows you to showcase your beach vacation memories
Whether you’re looking to make seashell jewelry, decorate a mirror with oyster shells, or create a seashell-themed centerpiece for your dining table, seashell crafts offer a world of possibilities. So let your creativity shine and start crafting with seashells today!
Get inspired to create your own seashell crafts by exploring the wide variety of beach crafts and coastal crafts you can make with seashells.
Beautiful Shadow Box Seashell Art

Create stunning shadow box seashell art by arranging shells in a shadow box frame. Combine different types and sizes of shells to create a unique and beautiful display. This is a great way to showcase your collection and add a beachy touch to your home decor.
Whether you’ve collected shells from your beach vacations or have a passion for seashell hunting, transforming them into art is a creative and fulfilling endeavor. Shadow box seashell art allows you to create a visually captivating display that brings the beauty of the beach into your home.
To get started, gather your favorite seashells. Look for shells of different shapes, sizes, and colors to add depth and variety to your art piece. You can collect shells from various seashores or repurpose shells from previous crafts.
Next, select a shadow box frame that suits your desired style and size. Shadow boxes have a deep frame that allows you to arrange items inside while protecting them from dust and damage. You can find shadow box frames in different materials and colors to match your home decor.
Gather Your Materials:
- Shadow box frame
- Assorted seashells
- Hot glue gun
- Scissors
- Foam adhesive tape (optional)
Once you have your materials ready, start arranging the seashells inside the shadow box. Experiment with different layouts and orientations until you find a design that pleases your eye. You can create a symmetrical pattern, a random placement, or even spell out words using shell shapes.
Use a hot glue gun to secure the shells in place. Apply small dots of glue on the backside of each shell and press them onto the backing of the shadow box. Be careful not to use too much glue to avoid any overflow onto the front of the shells.
If you prefer a temporary display or want to change the arrangement in the future, you can use foam adhesive tape instead of hot glue. This allows you to easily reposition the shells without damaging them or the shadow box.
Display and Enjoy:
Once you’ve finished securing the shells, close the shadow box frame and ensure that everything is securely in place. Make sure the glass or plexiglass front of the frame is clean and free from any fingerprints or smudges.
Find a suitable spot to showcase your shadow box seashell art. It could be on a wall in your living room, bedroom, hallway, or even in a bathroom to bring a coastal vibe to your space. Consider the overall decor and color scheme of the room to choose the perfect location.
Every time you gaze at your shadow box seashell art, you’ll be transported to sandy beaches and the serenity of the ocean. It’s a beautiful reminder of the natural beauty found in seashells.
| Benefits of Shadow Box Seashell Art: |
|---|
| • Showcases your seashell collection |
| • Adds a beachy touch to your home decor |
| • Provides a visually captivating display |
| • Allows for creative arrangements and designs |
| • Protects shells from dust and damage |
Angel Ornaments Made with Shells

Looking for a creative and charming way to decorate your Christmas tree? Why not make angel ornaments using seashells? These DIY seashell crafts add a coastal touch to your holiday decor and can also be used as year-round decorations. Here’s how to make your own seashell angel ornaments:
- Start by gathering your materials. You’ll need a large seashell for the body and smaller shells for the wings and head. You can choose shells with different colors and shapes to add variety to your angels.
- Using a strong adhesive, glue the large shell upright to create the body of the angel. Make sure it’s securely attached.
- Next, glue two smaller shells to the back of the large shell to form the wings. Position them at an angle, giving the appearance of wings spread out.
- For the head, glue a smaller shell on top of the large shell. This will serve as the angel’s face.
- If desired, you can add additional embellishments such as small pearls or sequins to decorate the angel’s wings or create a halo using a thin wire.
- Once the glue is dry, attach a ribbon or string to the top of the angel to hang it on your Christmas tree or anywhere else you’d like.
These seashell angel ornaments make a lovely addition to any Christmas tree and can be customized to match your personal style. They also make great gifts for loved ones. Get creative and have fun crafting these unique seashell decorations for the holidays!
| Materials | Instructions |
|---|---|
| Large seashell | 1. Start by gathering your materials. |
| Small seashells | 2. Using a strong adhesive, glue the large shell upright to create the body of the angel. |
| Adhesive | 3. Next, glue two smaller shells to the back of the large shell to form the wings. |
| Ribbon or string | 4. For the head, glue a smaller shell on top of the large shell. |
| Optional embellishments (pearls, sequins, wire) | 5. If desired, you can add additional embellishments such as small pearls or sequins to decorate the angel’s wings or create a halo using a thin wire. |
Seashell Bookends With Scraps of Wood

Looking for a unique way to display your favorite books while adding a touch of coastal charm to your space? Why not create your own seashell bookends with scraps of wood! This easy DIY project combines the beauty of seashells with the rustic appeal of wood, resulting in functional and decorative bookends that are sure to catch the eye.
To make your seashell bookends, you’ll need:
- Scrap pieces of wood (such as reclaimed wood or driftwood)
- A selection of seashells
- Strong adhesive glue
Here’s a step-by-step guide on how to create your seashell bookends:
- Start by selecting two matching pieces of wood that are approximately the same length and thickness. The width can vary depending on your preference.
- Thoroughly clean and dry the seashells to remove any sand or debris.
- Arrange the seashells on one side of each piece of wood, creating a pleasing design. You can mix and match different types of shells to add visual interest.
- Once you’re happy with the arrangement, use a strong adhesive glue to attach the seashells to the wood. Be generous with the glue to ensure a secure bond.
- Allow the glue to dry completely according to the manufacturer’s instructions. This may take several hours or overnight.
- Once the glue is fully dried and set, your seashell bookends are ready to use!
Place the bookends on either side of your book collection on a shelf or desk to hold them in place. The natural beauty of the seashells combined with the rustic look of the wood will add a delightful coastal touch to any space.
| Pros | Cons |
|---|---|
| Easy and fun DIY project | Requires access to seashells |
| Adds a unique and coastal touch to your bookshelf or desk | Requires patience for glue to dry completely |
| Customizable with various types and sizes of seashells | Glue can be messy, so take precautions |
So, gather your seashell collection and grab some scraps of wood to create your own seashell bookends. Not only will they keep your books organized, but they will also showcase your love for the coast and add a touch of seaside beauty to your home.
Decoupage Shell Dish DIY

Looking for a creative way to showcase your seashell collection? Why not try making a beautiful decoupage shell dish! This simple DIY project combines the beauty of seashells with the art of decoupage crafts.
To create your own seashell dish, start by cleaning and drying a flat shell. This will provide a smooth surface for the decoupage. Next, gather pieces of decorative paper or napkins that you love. These can feature beachy patterns, seashell designs, or any other motifs that resonate with you.
Pro Tip: You can find decorative paper or napkins at craft stores or repurpose old wrapping paper or tissue paper for this project.
Once you have your materials ready, apply decoupage glue to the shell using a brush or sponge. Make sure to cover the entire surface evenly. Then, begin layering the pieces of decorative paper onto the shell, smoothing out any wrinkles or air bubbles as you go.
Pro Tip: Tear the paper into smaller pieces, rather than using large sheets, for easier application.
Allow the decoupage shell dish to dry completely. This may take a few hours or overnight, depending on the type of glue you are using. Once dry, your seashell dish is ready to be displayed!
You can use your decoupage shell dish to hold small treasures like jewelry, coins, or keys. It also makes a beautiful decorative piece on its own. Place it on a coffee table, shelf, or any other surface that could use a touch of coastal charm.
Materials Needed:
- A flat seashell
- Decorative paper or napkins
- Decoupage glue
- Brush or sponge
Step-by-Step Instructions:
- Clean and dry a flat seashell.
- Apply decoupage glue to the shell.
- Layer pieces of decorative paper or napkins onto the shell.
- Smooth out any wrinkles or air bubbles.
- Allow the shell to dry completely.
- Display and enjoy your beautiful decoupage shell dish!
Get creative with your design by experimenting with different patterns, colors, and types of paper. Personalize your seashell dish to match your home decor or create a unique gift for a friend or loved one.
“I love using seashells in my crafting projects. The decoupage shell dish adds a touch of elegance to my coastal-inspired home decor.” – Sarah, DIY Enthusiast
Gorgeous Oyster Shell Jewelry Dishes

Transform oyster shells into stunning jewelry dishes by cleaning them thoroughly and adding a coat of paint. Once dry, the dishes can be used to store rings, earrings, and other small pieces of jewelry. It’s a great way to repurpose oyster shells and create functional, beautiful pieces.
Oyster shells offer a unique and natural material for crafting. Their smooth and iridescent surfaces make them perfect for creating jewelry dishes that add a touch of coastal charm to your home decor. With just a few simple supplies, you can transform these discarded shells into beautiful and functional pieces.
Step-by-Step Guide: How to Make Oyster Shell Jewelry Dishes
- Clean the shells: Start by cleaning the oyster shells thoroughly to remove any dirt or debris. Use a soft brush or toothbrush to gently scrub the shells under running water.
- Boil the shells: Boiling the shells helps to remove any remaining organic matter and sanitize them. Place the cleaned shells in a pot of water and bring it to a boil. Let the shells simmer for about 10 minutes, then remove them from the water and let them cool.
- Paint the shells: Once the shells are dry, choose a color of paint that complements your home decor or personal style. Apply a thin and even coat of paint to the inner surface of each shell. Let the paint dry completely.
- Add finishing touches: If desired, you can further embellish the jewelry dishes with additional decorative elements such as seashells, pearls, or beads. Use craft glue to securely attach the embellishments to the painted surface of the shells.
- Let it cure: Allow the glue to dry completely before using the oyster shell jewelry dishes to ensure they are sturdy and durable.
Now you have stunning oyster shell jewelry dishes that can be displayed on your vanity, dressing table, or any other area where you like to keep your favorite jewelry pieces within easy reach. These unique and handmade dishes not only provide a functional storage solution but also serve as eye-catching decor accents that celebrate the natural beauty of oyster shells.
Stunning Sea Glass Wind Chime with Seashells
Create a mesmerizing coastal craft by combining seashells and sea glass to craft a stunning wind chime. This DIY project will add a beautiful touch to your outdoor space and infuse it with the refreshing sounds of nature.
To create your sea glass wind chime, start by drilling small holes in both the seashells and sea glass pieces. Ensure that the holes are large enough to accommodate the twine or fishing line you will be using.
Next, thread the shells and sea glass onto a piece of twine or fishing line, alternating between the two materials to create an eye-catching pattern. Consider using shells of different shapes, sizes, and colors for an added visual appeal.
Once you have threaded all the shells and sea glass, tie a secure knot at the top of the twine or fishing line to create a loop for hanging.
“The soothing sounds of the sea glass wind chime will transport you to the beach, even if you’re miles away.”
Pro Tip: Hang your wind chime in an area where it will catch the breeze, such as a patio or garden. The gentle clinking of the shells and sea glass pieces will create a soothing and relaxing ambiance.
Enjoy the mesmerizing beauty and coastal charm your sea glass wind chime brings to your outdoor living space.
Oyster Shell Mirror
Add a touch of elegance and coastal charm to any room with an oyster shell mirror. This DIY project allows you to transform ordinary oyster shells into a stunning mirror frame that will be the centerpiece of your decor.
To create your oyster shell mirror, follow these simple steps:
- Clean the shells: Begin by cleaning the oyster shells to remove any debris or odor. Rinse them thoroughly with water and allow them to dry.
- Arrange the shells: Once the shells are clean and dry, arrange them around the edges of a mirror. Play with different sizes and angles to create an eye-catching pattern.
- Glue the shells: Using a strong adhesive, glue each shell onto the mirror frame. Make sure to secure them firmly in place. Allow the glue to dry completely.
Once your oyster shell mirror is complete, hang it on a wall or place it on a shelf to instantly elevate the ambiance of your space. The natural beauty of the oyster shells combined with the reflection of the mirror will create a focal point that captures the essence of coastal living.
Embrace the coastal crafts trend and showcase your creativity with an oyster shell mirror that adds a touch of sophistication to your home.
Conclusion
Seashell crafts are a fantastic way to ignite your creativity and add a touch of coastal charm to your home decor. Whether you’re a crafting enthusiast or just looking for a fun and easy DIY project, seashell crafts offer endless possibilities. From stunning shadow box seashell art to adorable angel ornaments made with shells, there’s something for everyone to enjoy.
With just a few simple materials and your favorite seashells, you can transform ordinary objects into beautiful works of art. Create unique bookends by attaching shells to scraps of wood or make a stylish decoupage dish using decorative paper and shells. The possibilities are truly endless when it comes to crafting with seashells.
So why wait? Gather your collection of seashells and start exploring the world of DIY seashell crafts today. Whether you’re a seasoned crafter or a beginner, you’ll find joy in turning these natural treasures into stunning pieces of coastal-inspired art. Let your imagination run wild and infuse your home with the beauty of the beach through the art of seashell crafting.
FAQ
Why are seashell crafts popular?
Seashell crafts are popular because they provide a creative outlet for all ages and are easy to find in coastal areas and beaches. Additionally, crafting with seashells allows people to showcase their collections and add a beachy touch to their home decor.
What are some easy seashell craft ideas?
Some easy seashell craft ideas include creating shadow box seashell art, making angel ornaments with seashells, crafting seashell bookends with scraps of wood, decoupaging seashells to make a stylish dish, transforming oyster shells into stunning jewelry dishes, creating a wind chime with seashells and sea glass, and making an oyster shell mirror.
How can I make shadow box seashell art?
To make shadow box seashell art, gather different types and sizes of shells and arrange them in a shadow box frame. This allows you to create a unique and beautiful display to showcase your seashell collection and add a beachy touch to your home decor.
How do I make angel ornaments with seashells?
To make angel ornaments with seashells, glue a large shell as the body and use smaller shells for the wings and head. Add a ribbon or string to hang them on your Christmas tree or use them as year-round decorations.
What materials do I need to make seashell bookends with scraps of wood?
To make seashell bookends, you will need seashells, scraps of wood, and glue. Simply glue the shells onto the wood and let them dry. These bookends will not only hold your books in place but also add a coastal touch to your bookshelf or desk.
How can I make a decoupage shell dish?
To make a decoupage shell dish, clean and dry a flat shell, then apply decoupage glue to the shell and layer on pieces of decorative paper or napkins. Once dry, you’ll have a stylish dish to hold small treasures or use as a decorative piece.
How do I transform oyster shells into jewelry dishes?
To transform oyster shells into jewelry dishes, clean them thoroughly and add a coat of paint. Once dry, the dishes can be used to store rings, earrings, and other small pieces of jewelry. It’s a great way to repurpose oyster shells and create functional, beautiful pieces.
How can I create a sea glass wind chime with seashells?
To create a sea glass wind chime with seashells, drill holes in the shells and sea glass, then thread them onto a piece of twine or fishing line. Hang the wind chime outdoors and enjoy the gentle sounds it creates as it catches the breeze.
What is the process for making an oyster shell mirror?
To make an oyster shell mirror, clean the shells and arrange them around the edges of a mirror, then glue them in place. The oyster shell mirror will add a touch of elegance and coastal charm to any room.
What are some different types of seashell crafts?
Some different types of seashell crafts include seashell wreaths, shell windchimes, shadow box seashell art, seashell holiday ornaments, seashell jewelry, seashell bookends, decoupage shell dishes, oyster shell crafts, and seashell mirrors.