Last Updated on 3 months by Francis
Have you been missing out on your weightlifting routine since the pandemic hit and closed down gyms? Don’t worry, you can create your own DIY power rack right at home. In this guide, we will provide you with step-by-step instructions and tips for building a sturdy and budget-friendly power rack for your home gym.
Contents
Key Takeaways:
- Building a DIY power rack allows for customization and cost savings.
- Materials needed for a DIY power rack include lumber, steel plates, and connectors.
- Constructing a sturdy frame is crucial for the safety of the power rack.
- Adding adjustable safety rails and weight bar brackets enhances functionality.
- The optional addition of casters makes the power rack mobile.
Why Build a DIY Power Rack?

Building a DIY power rack offers several advantages that make it a worthwhile endeavor. Firstly, by taking on the task yourself, you have the freedom to customize the design and features of your power rack to suit your specific needs. This means you can create a setup that perfectly accommodates your height, preferred exercises, and any other requirements you may have.
Secondly, opting for a homemade power rack can save you a significant amount of money compared to purchasing a pre-made one. Gym equipment can be expensive, and by using readily available materials and your own craftsmanship, you can build a sturdy and reliable power rack at a fraction of the cost.
Finally, building your own power rack gives you a sense of accomplishment and control over your fitness journey. As you put in the effort and sweat to construct your gym equipment, you develop a deeper appreciation for the process and a stronger connection to your workout routine. Having a homemade power rack in your home gym serves as a constant reminder of your dedication and the progress you’ve made.
Building a DIY power rack not only saves you money, but it also allows you to create a personalized workout space that aligns perfectly with your fitness goals and preferences.
By building your own power rack, you have the opportunity to design a versatile and functional piece of equipment that caters to your unique fitness needs. Whether you’re focused on strength training, bodybuilding, or general fitness, a DIY power rack offers a solid foundation for a wide range of exercises and workout routines.
DIY Power Rack vs. Pre-Made Power Rack
| DIY Power Rack | Pre-Made Power Rack |
|---|---|
| Customizable design and features | Limited customization options |
| Cost-effective | Higher price tag |
| Sense of accomplishment | No personal involvement in construction |
| Requires construction skills | Ready to use out of the box |
| Opportunity for personalization | Standardized design and features |
Materials and Tools Needed

Before you start building your DIY power rack, gather all the necessary materials and tools to ensure a smooth construction process. Here’s a list of what you’ll need:
Materials:
- 4×4 lumber
- Steel plates and connectors
- Screws
- Threaded pipes
Tools:
- Miter saw
- Drill
- Measuring square
- Various drill bits
Having the right materials and tools is crucial for constructing a sturdy and well-built power rack. Make sure you gather everything before you begin the construction process.
Note: The specific quantities of materials needed may vary depending on the design and size of your power rack. It’s recommended to consult your power rack plans or design to ensure you have the correct measurements and quantities.
| Materials | Tools |
|---|---|
| 4×4 lumber | Miter saw |
| Steel plates and connectors | Drill |
| Screws | Measuring square |
| Threaded pipes | Various drill bits |
With these materials and tools, you’re ready to start building your DIY power rack.
Building the Power Rack Frame

The first step in constructing your DIY power rack is building the frame. This foundational structure provides stability and support for your weightlifting exercises. Follow these steps to create a level and sturdy power rack frame:
- Cut the 4×4 lumber: Measure and mark the lumber according to your desired power rack dimensions. Use a miter saw to make precise cuts for the vertical uprights, horizontal crossbars, and base.
- Drill holes for safety rails and weight bar brackets: Using a drill with the appropriate drill bit, create holes on the vertical uprights to accommodate the adjustable safety rails and weight bar brackets. The holes should be evenly spaced and aligned.
- Add corner braces: Enhance the stability of your power rack by attaching corner braces at the junctions of the vertical uprights and crossbars. Use screws or steel plates to securely fasten the braces to the frame.
By following these steps, you can create a solid frame that serves as the backbone of your DIY power rack. The proper construction of the frame is crucial for ensuring the safety and effectiveness of your weightlifting workouts.
Adding Adjustable Safety Rails and Weight Bar Brackets

Once you have constructed the sturdy frame of your DIY power rack, it’s time to install the adjustable safety rails and weight bar brackets. These essential components provide the necessary support and safety during your weightlifting exercises, ensuring a secure and stable workout experience.
To begin, you will need to drill the appropriate holes in the power rack frame. Make sure to measure and mark the precise positions for the safety rail and weight bar bracket attachments. This will ensure that they are positioned correctly and securely.
Next, choose the appropriate hardware for attaching the safety rails and weight bar brackets. Opt for durable and sturdy screws or bolts that can withstand the weight and force exerted during your workouts. Using the right hardware will guarantee the longevity and reliability of your power rack.
Carefully position the safety rails at the desired height within the power rack frame. Insert the screws or bolts through the pre-drilled holes and tighten them securely. Repeat the process for the weight bar brackets, ensuring they are evenly spaced and aligned.
With the adjustable safety rails and weight bar brackets securely attached, you can now confidently perform a wide range of exercises on your DIY power rack. From bench presses to squats, these components will provide the necessary support and stability, allowing you to focus on your form and maximize your gains.
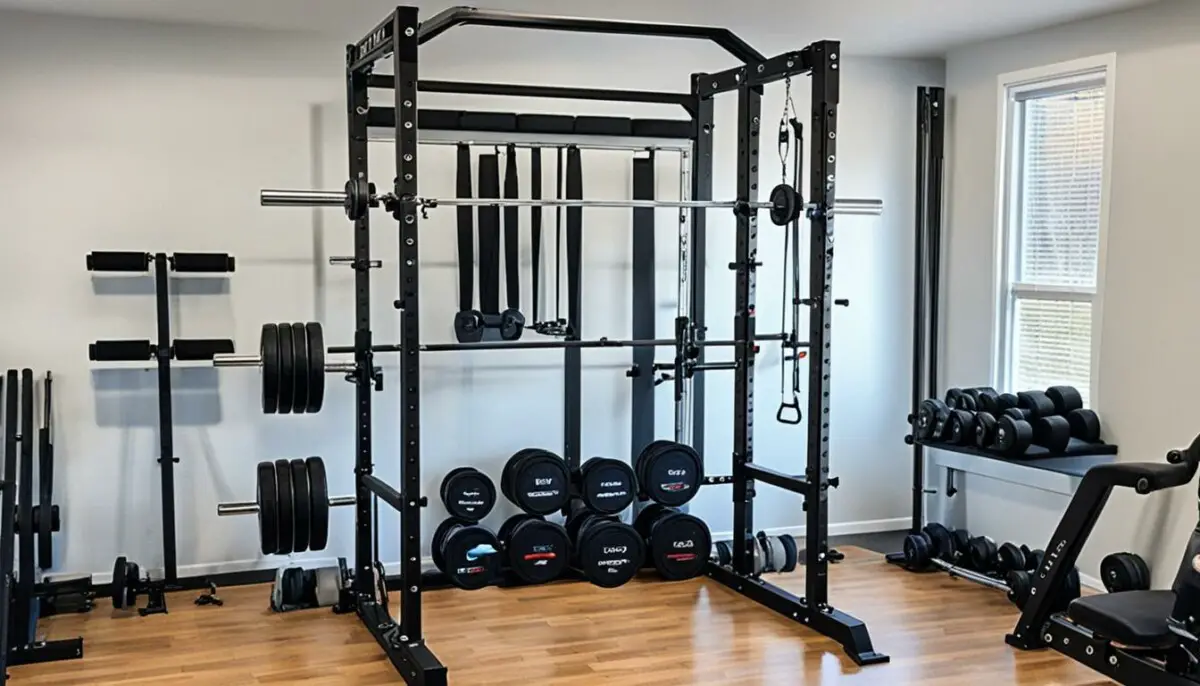
To visualize the installation process, refer to the diagram below:
Diagram: Power Rack with Adjustable Safety Rails and Weight Bar Brackets
| Power Rack Component | Installation |
|---|---|
| Adjustable Safety Rails | Position the safety rails at the desired height within the power rack frame. Insert screws/bolts through the pre-drilled holes and tighten securely. |
| Weight Bar Brackets | Space the weight bar brackets evenly within the power rack frame. Insert screws/bolts through the pre-drilled holes and tighten securely. |
Making the Power Rack Mobile (Optional)

If you want the flexibility to move your power rack, you can add casters to make it mobile. This allows you to easily rearrange your home gym or move the power rack out of the way when not in use. Adding casters requires additional hardware and careful installation to ensure stability and safety.
By attaching casters to the base of the power rack, you can transform it into a portable fitness station. Whether you need to create more space in your workout area or simply want to change the layout of your gym, having a mobile power rack offers convenience and versatility.
When selecting casters for your power rack, consider the following factors:
- Weight capacity: Choose casters that can support the weight of your power rack and additional equipment.
- Locking mechanism: Opt for casters with a locking mechanism to ensure stability during workouts.
- Swivel vs. fixed casters: Swivel casters allow for easy maneuverability, while fixed casters provide more stability.
Once you have chosen the appropriate casters, follow these steps to install them:
- Securely fasten the casters to the base of the power rack using screws or bolts.
- Test the mobility of the power rack by gently moving it in different directions.
- Ensure that the casters lock in place to prevent any movement during workouts.
- Double-check the stability of the power rack before using it for weightlifting exercises.
By making your power rack mobile, you can easily adapt your home gym to accommodate different workout routines or create space for other activities. The ability to move your power rack with ease enhances the functionality and versatility of your DIY gym setup.
Now that your power rack is mobile, you can effortlessly transform your home gym to suit your fitness needs. Whether you’re focusing on strength training, powerlifting, or bodyweight exercises, having a portable power rack allows you to optimize your workouts with convenience and flexibility.
Adding Weight Storage and Pull-Up Bar
Upgrading your DIY power rack with weight storage and a pull-up bar can enhance its functionality and provide more exercise options for your home gym. Adding weight storage allows you to keep your weights organized and easily accessible during your workouts. Meanwhile, a pull-up bar provides an excellent upper body workout, targeting your back, shoulders, and arms.
Weight Storage
Attaching weight storage to the exterior of your power rack frame is a simple and effective solution. You can easily customize it based on the available space and your specific needs. One popular method is to install hooks or shelves to hold your weight plates securely. This not only keeps your weights neatly organized but also saves floor space in your home gym.
Pull-Up Bar
A pull-up bar is a versatile addition to your DIY power rack, allowing you to work on your upper body strength and build muscle in various areas. To create a sturdy and secure pull-up bar, you can use a steel pipe and fittings that can support your body weight. Ensure that the bar is at a suitable height to accommodate different users and their specific exercise requirements.
| Benefits of Weight Storage and Pull-Up Bar |
|---|
| 1. Organized and accessible weight storage |
| 2. Efficient use of space in your home gym |
| 3. Versatile upper body workout with a pull-up bar |
| 4. Target multiple muscle groups with pull-up exercises |
“By incorporating weight storage and a pull-up bar into your DIY power rack, you can maximize your workout options and create a more comprehensive home gym experience.” – Fitness enthusiast
By customizing your power rack with weight storage and a pull-up bar, you can transform it into a multifunctional fitness station. This allows you to perform a wide range of exercises conveniently in the comfort of your own home. Whether you’re focused on strength training or improving your overall fitness, these additions will take your workouts to the next level.
Upholstering and Finishing Touches
Once you have built the frame and added the necessary components to your DIY power rack, it’s time to add the finishing touches to enhance both its aesthetics and comfort. Upholstering the safety rails and weight bar brackets not only adds a stylish look but also provides cushioning and protection during your workouts. Additionally, you can paint or stain the power rack to match your personal style and preferences.
Upholstering the Safety Rails and Weight Bar Brackets
To upholster the safety rails and weight bar brackets, you will need padding and a durable fabric. Start by measuring the length and width of the safety rails and weight bar brackets, ensuring you have enough padding and fabric to cover them completely. Cut the padding into strips and wrap them around the safety rails and weight bar brackets, securing them with strong adhesive or heavy-duty tape.
Once the padding is in place, cut the fabric into long strips, making sure they are wide enough to cover the padding and wrap around the safety rails and weight bar brackets. Start wrapping the fabric around the padding, pulling it tight to ensure a snug fit. Secure the fabric by using staples, glue, or sewing the ends together. Repeat the process for each safety rail and weight bar bracket, ensuring a consistent and professional look.
Painting or Staining the Power Rack
If you want to add a touch of personalization to your DIY power rack, consider painting or staining it. This allows you to match the power rack to your existing home gym decor or create a stand-out piece that reflects your style. Before painting or staining, ensure that the power rack is clean and free of any dust or debris. You may also need to sand the surface lightly to create a smooth and even finish.
Choose a paint or stain color that suits your preference and complements the overall aesthetic of your home gym. Apply thin and even coats of paint or stain using a brush or roller, making sure to cover all surfaces of the power rack. Allow each coat to dry completely before adding another layer. Once you are satisfied with the color and finish, let the final coat dry thoroughly.
Pro Tip: Before applying paint or stain, consider using a primer to ensure better adhesion and a longer-lasting finish.
| Pros of Upholstering and Finishing | Cons of Upholstering and Finishing |
|---|---|
| Enhances the aesthetics of the power rack | Requires additional materials and time |
| Provides cushioning and protection during workouts | May add some extra weight to the power rack |
| Allows for personalization and matching with home gym decor | Requires regular maintenance to keep the upholstery and finish in good condition |
Adding upholstery and finishing touches to your DIY power rack can elevate its overall appeal and make it a focal point in your home gym. Whether you choose to upholster the safety rails and weight bar brackets or apply a fresh coat of paint or stain, these small details can make a big difference in creating a functional and visually pleasing workout space.
Recommended Alternatives to DIY Power Rack
While building a DIY power rack can be a rewarding project, it may not be suitable for everyone. If you prefer to purchase a pre-made power rack, there are various options available on the market. Brands like Rogue Fitness and Titan Fitness offer high-quality and durable power racks that can meet your fitness needs.
| Brand | Features | Price Range |
|---|---|---|
| Rogue Fitness | Sturdy construction, adjustable safety rails, weight storage options, pull-up bars, customizable design | $500 – $2000 |
| Titan Fitness | Durable materials, adjustable height, weight plate storage, pull-up bars, affordable options | $300 – $1000 |
If you’re looking for a reliable, ready-to-use power rack, explore these brands to find the perfect fit for your home gym. Whether you prioritize customization, price, or specific features, Rogue Fitness and Titan Fitness offer a range of options to suit your preferences. Remember to consider your budget, available space, and training goals when choosing a pre-made power rack.
Conclusion
Building your own DIY power rack is the perfect solution for creating a functional home gym without breaking the bank. By following the provided power rack plans and utilizing the right materials and tools, you can construct a sturdy and versatile power rack that meets your specific needs.
Having a power rack in your home gym opens up a world of possibilities for strength training exercises. With adjustable safety rails and weight bar brackets, you can safely perform various lifts and workouts, targeting different muscle groups and optimizing your training sessions.
Whether you choose to build your power rack from scratch or opt for a pre-made option from reputable brands like Rogue Fitness or Titan Fitness, incorporating a power rack into your home gym setup will greatly enhance your weightlifting routine. It not only provides the necessary support and safety but also offers the convenience of working out in the comfort of your own space.
So, why wait? Start gathering the materials, grab your tools, and embark on this exciting DIY project to build your own power rack. Get ready to take your strength training to new heights and achieve your fitness goals with a homemade power rack that you can be proud of!
FAQ
What are the advantages of building a DIY power rack?
Building a DIY power rack allows you to customize the design and features to fit your needs, save money compared to purchasing a pre-made rack, and gives you the satisfaction of creating your own gym equipment.
What materials and tools do I need to build a DIY power rack?
You will need materials such as 4×4 lumber, steel plates and connectors, screws, and threaded pipes. The tools required include a miter saw, drill, measuring square, and various drill bits.
How do I build the power rack frame?
The process involves cutting the 4×4 lumber to size, drilling holes for adjustable safety rails and weight bar brackets, and adding corner braces for extra stability.
How do I install the adjustable safety rails and weight bar brackets?
By drilling the appropriate holes and using the right hardware, you can securely attach the safety rails and weight bar brackets to the power rack frame.
Can I make the power rack mobile?
Yes, by adding casters, you can make the power rack mobile and easily move it around your home gym.
How can I add weight storage and a pull-up bar to my power rack?
Weight storage can be achieved by attaching hooks or shelves to the exterior of the power rack frame, and a pull-up bar can be created using a steel pipe and fittings.
Can I upholster the safety rails and weight bar brackets?
Yes, you can wrap them with padding and a durable fabric to provide cushioning and protection.
Where can I purchase a pre-made power rack?
Brands like Rogue Fitness and Titan Fitness offer high-quality and durable pre-made power racks for purchase.
Is building a DIY power rack suitable for everyone?
While it can be a rewarding project, it may not be suitable for everyone. However, there are pre-made power rack options available on the market.
What are the benefits of having a power rack in a home gym?
A power rack enhances the safety and effectiveness of weightlifting exercises, allowing you to perform a variety of strength training workouts at home.