Last Updated on 3 months by Francis
If your pool pump loses pressure when vacuuming, it can be a frustrating issue to deal with. Proper suction is essential for effective cleaning, and when the pump isn’t working properly, it can hinder the maintenance of your pool. In this article, we will explore some common causes of pool pump pressure loss during vacuuming and provide troubleshooting tips to help you resolve the problem.
When your pool pump loses pressure while vacuuming, it can be indicative of various underlying issues. It’s important to carefully examine each potential cause and address it accordingly to restore proper suction. Whether it’s air bubbles in the hose, clogs in the vacuum hose, a collapsing suction hose, or a faulty Pump Lid O-Ring, we have you covered with comprehensive troubleshooting guides and solutions.
Contents
Key Takeaways:
- Pool pump pressure loss during vacuuming can be caused by various factors.
- Air bubbles in the hose, clogs in the vacuum hose, a collapsing suction hose, and a faulty Pump Lid O-Ring are common culprits.
- By following our troubleshooting guides, you can identify and resolve the specific issue affecting your pool pump’s suction.
- Regular pool pump maintenance is essential to ensure optimal performance and prevent future problems.
- Don’t hesitate to seek professional assistance if you encounter more complex pump issues that require technical expertise.
Air in the Hose

When you first connect your vacuum hose to the skimmer, it is possible for air to get trapped inside. This can cause the pump to lose prime and result in low pressure. To eliminate air bubbles, hold the hose up to a return jet while the pump is running to blow out any trapped air.
| Common Causes | Solutions |
|---|---|
| Air trapped in the hose | Hold the hose up to a return jet to blow out the trapped air |
| Loss of pump prime | Ensure all hose connections are secure and tight |
| Leaking connections | Inspect and replace any faulty or damaged connections |
| Worn-out pump lid O-ring | Replace the pump lid O-ring if necessary |
By addressing the issue of air in the hose, you can prevent pressure loss and maintain proper suction for effective pool vacuuming.
Holes or Clogs in the Vacuum Hose

Inspecting your pool vacuum hose for holes or clogs is essential in maintaining optimal suction during the cleaning process. Holes in the vacuum hose can lead to air being sucked into the system, resulting in a loss of pressure. Likewise, clogs caused by debris or foreign objects can impede water flow, further hindering suction effectiveness.
To fix holes in your vacuum hose, carefully examine the entire length of the hose, paying close attention to the top portion where the hose connects to the skimmer or vacuum head. If any holes are detected, promptly patch them using a suitable repair kit or replace the hose if necessary. This will prevent air from being drawn in and ensure consistent suction throughout the cleaning process.
Clearing debris and clogs from the vacuum hose is equally important. Start by disconnecting the hose from the skimmer or vacuum head and inspecting it for any visible obstructions. Use a long, flexible brush or a high-pressure nozzle attachment to dislodge and remove any debris or foreign objects trapped within the hose. Ensure that the hose is completely clear before reattaching it to the cleaning equipment.
Regularly inspecting your pool vacuum hose for holes and clogs, and promptly addressing any issues, will help maintain optimal suction and ensure effective cleaning of your pool.
Remember, a well-functioning vacuum hose is essential for keeping your pool clean and inviting!
Benefits of Regular Inspection and Maintenance:
- Prevents air leaks and pressure loss
- Maintains optimal suction for efficient cleaning
- Enhances overall pool cleanliness and water clarity
- Prolongs the lifespan of the vacuum hose
“Regular inspection and maintenance of the vacuum hose are key to maintaining optimal suction and a clean pool.” – Pool Maintenance Experts
Vacuum Hose Maintenance Checklist
| Step | Task |
|---|---|
| 1 | Inspect the entire vacuum hose for holes or damage |
| 2 | Patch any holes or replace the hose if necessary |
| 3 | Disconnect the hose and clear any debris or clogs |
| 4 | Reattach the hose securely to the skimmer or vacuum head |
| 5 | Regularly monitor the hose for any signs of wear or deterioration |
Collapsing Suction Hose
In some instances, the suction hose connecting your pool to the pump’s intake can collapse under the increased suction pressure during vacuuming. This collapse can disrupt the flow of water and result in decreased efficiency. To prevent suction hose collapse, it is essential to ensure that the hose is firm and sturdy.
If you notice that your hose is weak or worn out, it may be time to consider replacing it with a more durable option. A firm pool suction hose will help maintain proper suction and prevent collapse, ensuring optimal performance during your vacuuming routine.
By investing in a high-quality suction hose, you can minimize the risk of collapse and enjoy hassle-free pool maintenance. Below is a comparison table of different suction hoses available on the market:
| Product | Material | Length | Diameter | Price |
|---|---|---|---|---|
| PoolMaster Suction Hose | Heavy-duty PVC | 50 ft | 1.5 in | $39.99 |
| Aqua Select Suction Hose | Reinforced EVA | 40 ft | 1.25 in | $29.99 |
| Swimline Heavy-Duty Hose | Flexible PVC | 30 ft | 1.25 in | $24.99 |
Choose the suction hose that best meets your needs, ensuring it is the right length and diameter for your pool setup. With a firm and reliable suction hose, you can vacuum your pool with confidence, free from the worry of collapse and subsequent pressure loss.
Pump Lid O-Ring

The Pump Lid O-Ring is an essential component of your pool pump that helps maintain a proper seal between the lid and the pump housing. Over time, the O-Ring may become worn or damaged, resulting in an air leak at the pump lid. This can lead to a loss of pressure and reduced suction during vacuuming.
To fix a pump lid air leak, you will need to replace the Pump Lid O-Ring. Here is a step-by-step guide to help you replace the O-Ring and fix the air leak:
- Turn off the pool pump and disconnect the power supply to ensure safety.
- Remove the pump lid by turning it counterclockwise. Be cautious as there may be some residual water in the pump.
- Inspect the Pump Lid O-Ring for any signs of wear, cracks, or damage. If you notice any issues, it’s time to replace the O-Ring.
- Measure the diameter of the old O-Ring and purchase a compatible replacement O-Ring from your local pool supply store or trusted online retailer.
- Clean the pump lid and housing to remove any debris or residue. This will ensure a proper seal with the new O-Ring.
- Apply a thin layer of lubricant specifically designed for O-Rings to the new O-Ring. This will help create a smooth and secure seal.
- Align the new O-Ring in the groove on the pump lid.
- Carefully place the pump lid back onto the pump housing and turn it clockwise to secure it.
- Turn on the pool pump and check for any air leaks or pressure loss. If everything looks good, you have successfully fixed the pump lid air leak.
Replacing the Pump Lid O-Ring should resolve any air leaks and help maintain optimal suction and pressure in your pool pump. Regularly inspect and replace the O-Ring as part of your pool pump maintenance routine to prevent future air leaks and ensure the efficient operation of your pool system.
Suction Side Blockage

If there is air in the pump basket and a drop in filter pressure, it may indicate a suction side blockage. This could occur anywhere between the pump and the skimmer. Inspect and clear any blockages in the suction pipe to restore proper flow and eliminate pressure loss.
The suction side blockage can impede the efficient operation of your pool pump and filtration system. It is essential to address this issue promptly to ensure your pool stays clean and properly maintained.
Possible Causes of Suction Side Blockage
- Debris or objects stuck in the skimmer basket or skimmer throat.
- Blockage in the suction lines caused by leaves, twigs, or other debris.
- Damaged or worn-out suction pipe connections.
- Malfunctioning or ineffective suction line valves.
Steps to Clear Suction Side Blockage
- Turn off the pool pump and ensure that the electrical power is disconnected to prevent accidents.
- Remove the skimmer basket and inspect it for any debris or clogs. Clean it thoroughly if necessary.
- Check the skimmer throat and remove any visible debris or obstructions.
- Inspect the suction lines for potential blockages. Use a pool vacuum or a plumber’s snake to clear any clogs.
- Inspect the suction pipe connections for any damage or leaks. Repair or replace if needed.
- Verify the proper functioning of the suction line valves and ensure they are fully opened.
- Once you have cleared the blockages and addressed any issues, reassemble the skimmer basket and turn on the pool pump.
- Monitor the filter pressure and check the pump basket for remaining air or debris. If necessary, repeat the process until optimal suction is achieved.
Clearing a suction side blockage is crucial to maintain a healthy and properly functioning pool. Regular maintenance and inspection of the suction lines and skimmer can help prevent blockages and ensure efficient water circulation.
Return Side Blockage

If you’re experiencing increased filter pressure in your pool pump, a potential cause could be a return side blockage. To diagnose and rectify this issue, it’s important to check for any blockages in the return pipe after the filter.
If the blockage is located between the pump and the filter, it can result in a decrease in pressure specifically when vacuuming. To restore proper water flow and maintain optimal pressure, it is crucial to clear any obstructions that may be present.
| Common Signs of Return Side Blockage | Solutions |
|---|---|
| Increased filter pressure | Check for blockages in the return pipe |
| Pressure changes when vacuuming to waste | Clear any obstructions in the return pipe |
If you identify a blockage in the return pipe, carefully remove and clear any debris or foreign objects that may be causing the obstruction. Once the pipe is clear, the water flow and overall pressure should return to normal.
Note: In the case where the blockage is beyond your reach or persists even after clearing the return pipe, it’s recommended to consult a professional for further assistance.
By addressing any return side blockages in your pool system, you can ensure optimal flow, maintain appropriate filter pressure, and effectively resolve any issues related to pressure loss during vacuuming.
Skimmer Inspection

Perform a thorough inspection of the skimmers to ensure proper suction. The skimmers are an essential component of your pool’s filtration system, responsible for capturing debris and maintaining water clarity. It is important to regularly check the skimmers for any signs of clogging or obstruction.
Start by visually examining both skimmers. Look for any visible debris, such as leaves, twigs, or other foreign objects, that may be blocking the skimmer basket and impeding water flow. Use a skimmer net or a pool vacuum to remove any debris from the skimmer basket.
Next, perform a skimmer suction test to ensure equal suction in both skimmers. Close off one skimmer at a time by blocking the opening with a skimmer plug or a tennis ball. With the other skimmer open, observe the flow of water and the formation of air bubbles in the skimmer. Repeat the process for the second skimmer.
If one skimmer is not receiving the same amount of suction or producing the same amount of air bubbles as the other, it may indicate a clog or obstruction. In such cases, you will need to investigate further to identify and clear the blockage.
Clearing a Clogged Skimmer
If you discover a clogged skimmer during the inspection, there are a few steps you can take to resolve the issue:
- Turn off the pool pump to ensure safety.
- Remove the skimmer basket and clean it thoroughly, removing any debris or obstructions.
- Use a pool skimmer or a plumbing snake to clear any blockages in the skimmer line.
- If the clog persists, consider using a specialized skimmer cleaner or contacting a professional pool service technician to resolve the issue.
Regular skimmer inspection and maintenance are crucial for maintaining optimal suction and preventing potential issues with your pool’s filtration system. By staying vigilant and addressing any clogs or obstructions promptly, you can ensure that your skimmers are functioning correctly and effectively removing debris from your pool.
Vacuum Head and Plate Examination

When troubleshooting pool pump pressure loss during vacuuming, it’s important to thoroughly examine the vacuum head and plate. These components play a crucial role in maintaining proper suction and pressure. By performing a detailed inspection and addressing any issues, you can ensure optimal performance for your pool pump.
Examining the Vacuum Head
The first step is to carefully inspect the vacuum head for any cracks or damage that could lead to air leaks. Cracks or fractures in the vacuum head can compromise its effectiveness and reduce suction power. Use your hands to feel for any irregularities or visual cues to identify potential areas of concern.
If you notice any damage, it’s essential to address it promptly. Depending on the severity of the issue, you may be able to repair the vacuum head with a suitable adhesive or sealant. In more severe cases, it may be necessary to replace the entire vacuum head to restore proper suction.
Inspecting the Vacuum Plate
The vacuum plate is another critical component that requires thorough inspection. Check the vacuum plate seal to ensure a tight and secure connection. A loose or ineffective seal can result in air leaks and decreased suction. Carefully examine the seal for any signs of wear, damage, or deterioration.
If you find any issues with the vacuum plate seal, it’s crucial to address them promptly. Replace the seal if necessary to ensure a proper and airtight connection between the vacuum plate and the pool pump. This will help maintain consistent suction and prevent pressure loss during vacuuming.
Regularly examining the vacuum head and plate is an integral part of pool pump maintenance. By addressing any problems with these components, you can ensure optimal suction and pressure, allowing for effective pool cleaning.
“Proper inspection and maintenance of the vacuum head and plate are crucial for maintaining optimal suction and pressure.”
Now that we’ve examined the vacuum head and plate, let’s move on to the next section, where we will discuss pump performance and potential issues that may affect suction.
Pump Performance
Ensuring optimal pool pump performance is crucial for maintaining proper suction during vacuuming. By assessing the overall condition of the pump, you can identify and address any issues that may be affecting its efficiency. Here are some key aspects to consider:
Impeller Inspection
The impeller plays a vital role in creating suction and moving water through the pump system. Check for any damage, debris, or blockages that may be obstructing the impeller’s function. Clean or replace the impeller if necessary to restore proper flow.
Motor Functionality
The motor is the heart of the pump, powering its operation. Inspect the motor for any signs of damage, such as unusual noises or excessive heat. If you notice any issues, consult a professional for further assessment and possible repairs.
Pump Maintenance
Regular maintenance is crucial for ensuring optimal pump performance. Follow the manufacturer’s guidelines for routine maintenance tasks, such as lubricating bearings, checking seals, and cleaning debris from the pump basket. Proper maintenance can extend the lifespan of your pump and prevent potential issues.
Cleaning and Adjusting the Pump Lid
The pump lid should be kept clean and tightly secured to prevent air leaks. Inspect the lid for any damage and ensure that the O-ring is intact. Clean the lid and O-ring regularly to maintain a proper seal during operation.
“A well-maintained and efficient pool pump is essential for maintaining clean and clear pool water.”
By addressing any impeller or motor issues and performing regular maintenance, you can maximize the performance of your pool pump and ensure optimal suction during vacuuming.
| Common Pump Performance Issues | Solutions |
|---|---|
| Weak suction | – Check and clean the impeller – Remove any debris blocking the water flow – Ensure the pump is appropriately sized for your pool |
| Loud or strange noises | – Inspect the motor for any damage or loose parts – Verify that the pump is securely mounted – Consult a professional if needed |
| Excessive vibration | – Check for loose or worn-out components – Balancing the impeller if necessary – Verify that the pump is on a stable foundation |
| Increased energy consumption | – Ensure that the pump is properly sized for your pool – Clean or replace the filter regularly to reduce strain on the pump – Consider upgrading to a more energy-efficient pump model |
Troubleshooting Steps Summary
To summarize the troubleshooting steps for pool pump pressure loss during vacuuming, follow these key actions to fix the suction problems:
- Eliminate air in the hose: Air bubbles in the hose can cause pressure loss. Hold the hose up to a return jet while the pump is running to blow out any trapped air.
- Check for holes or clogs in the vacuum hose: Inspect the vacuum hose for any holes or clogs that may obstruct proper suction. Patch any holes and clear any debris to restore suction.
- Ensure the suction hose does not collapse: Increased suction pressure during vacuuming can cause the hose to collapse. Replace weak or worn out hoses with more durable options to prevent collapse.
- Inspect the Pump Lid O-Ring: Check the Pump Lid O-Ring for any damage or wear. Replace it if necessary to prevent air leaks and maintain proper suction.
- Clear any blockages in the suction or return pipe: Inspect and clear any blockages in the suction and return pipes to restore proper water flow and pressure maintenance.
- Examine the skimmers, vacuum head, and plate: Ensure the skimmers are free of debris and both receive equal air bubble results. Inspect the vacuum head for cracks or damage and check the vacuum plate seal for a tight connection.
- Assess pump performance: Check for any issues with the impeller or motor that may affect suction. Properly maintain and address any mechanical problems with the pump to restore pressure during vacuuming.
By addressing these potential issues, you can troubleshoot, fix pool pump suction problems, and maintain proper pressure while vacuuming.
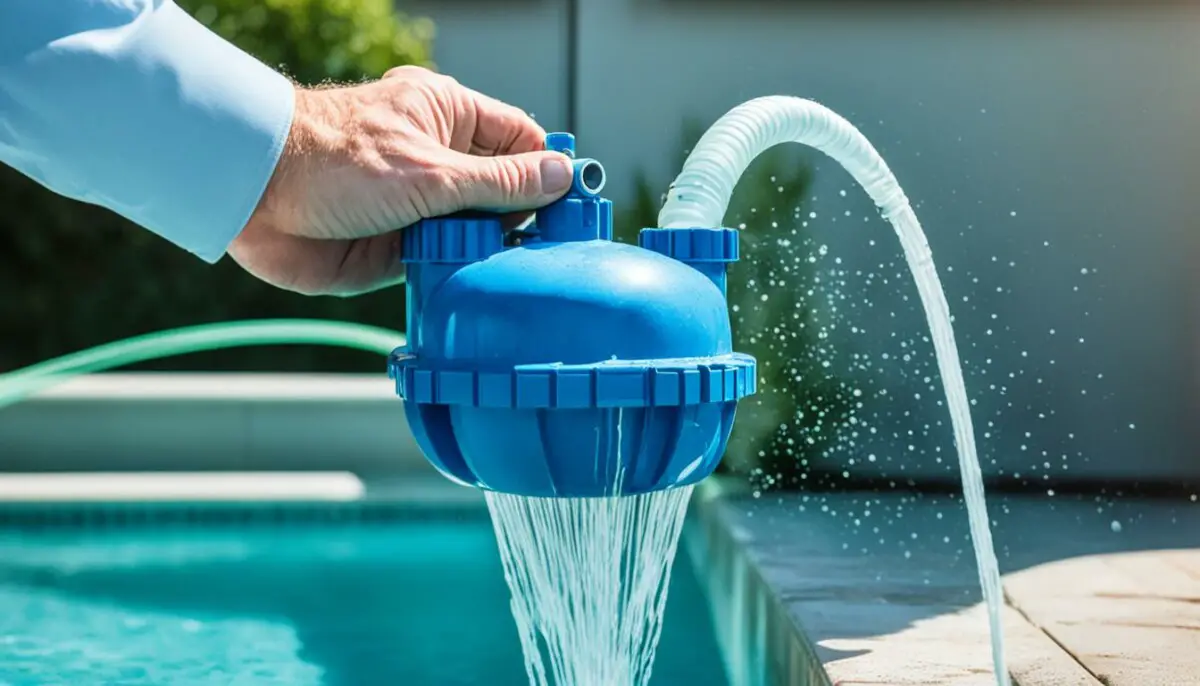
Note: The image above illustrates the troubleshooting process for pool pump pressure loss during vacuuming.
Conclusion
Troubleshooting pool pump pressure loss during vacuuming requires a systematic approach to identify and resolve the root cause of the issue. By following the steps outlined in this guide, you can effectively troubleshoot and fix the suction problem. Remember to regularly maintain your pool pump to ensure optimal performance and prevent future issues.
Addressing common culprits such as air bubbles in the hose, holes or clogs in the vacuum hose, collapsing suction hose, and a faulty Pump Lid O-Ring can help restore proper suction and eliminate pressure loss. Additionally, inspecting and clearing blockages in the suction and return pipes, as well as examining the skimmers, vacuum head, and plate, can further contribute to maintaining the performance of your pool pump.
Regular maintenance of your pool pump is crucial in maintaining its performance and preventing future problems. By addressing potential issues promptly and conducting routine maintenance tasks such as checking the pump impeller and motor, you can ensure your pool pump operates smoothly during vacuuming and prolong its lifespan. Remember to refer back to this troubleshooting guide whenever you encounter pool pump pressure loss during vacuuming for a comprehensive solution.
FAQ
Why is my pool pump losing pressure when vacuuming?
If your pool pump is losing pressure when vacuuming, there could be several potential causes. Common culprits include air bubbles in the hose, holes or clogs in the vacuum hose, a collapsing suction hose, and a faulty Pump Lid O-Ring.
How do I remove air from the vacuum hose?
When you first connect your vacuum hose to the skimmer, it is possible for air to get trapped inside. This can cause the pump to lose prime and result in low pressure. To eliminate air bubbles, hold the hose up to a return jet while the pump is running to blow out any trapped air.
What should I do if there are holes or clogs in the vacuum hose?
Inspect the vacuum hose for any holes or clogs that may be obstructing proper suction. Patch any holes or replace the hose if necessary, and clear any clogs to restore suction.
How can I prevent the suction hose from collapsing?
When the suction pressure increases due to vacuuming, it can cause the hose between the pool and the pump’s intake to collapse. Ensure that the suction hose is firm and does not collapse under the increased pressure. If the hose is weak or worn out, consider replacing it with a more durable option.
What should I do if the Pump Lid O-Ring is faulty?
The Pump Lid O-Ring is a common area where air can enter the system and cause pressure loss. Check the Pump Lid O-Ring for any damage or wear, and replace it if necessary to prevent air leaks and maintain proper suction.
How can I clear a blockage in the suction pipe?
If there is air in the pump basket and a drop in filter pressure, it may indicate a suction side blockage. Inspect and clear any blockages in the suction pipe to restore proper flow and eliminate pressure loss.
What should I do if there is a blockage in the return pipe?
A return side blockage can cause an increase in filter pressure. Check for any blockages in the return pipe after the filter. If the blockage is located between the pump and the filter, it may result in a decrease in pressure when vacuuming. Clear any obstructions to ensure proper water flow and pressure maintenance.
How can I ensure optimal suction from the skimmers?
Perform a thorough inspection of the skimmers to ensure proper suction. Check both skimmers to see if they are receiving equal air bubble results. Clear any debris or blockages from the skimmers to guarantee optimal suction.
How do I examine the vacuum head and plate?
Examine the vacuum head and plate for any issues that may affect suction. Check for any cracks or damage to the vacuum head that could cause air leaks. Inspect the vacuum plate seal to ensure a tight and secure connection. Address any problems with the vacuum head or plate to maintain proper suction and pressure.
What should I do if my pool pump is not working properly?
Assess the overall performance of the pool pump. Check for any issues with the impeller or motor that may be affecting suction. Ensure that the pump is properly maintained and functioning correctly. If there are any mechanical problems with the pump, it may require professional assistance or repairs to restore pressure during vacuuming.
What are the troubleshooting steps for pool pump pressure loss during vacuuming?
To summarize the troubleshooting steps: eliminate air in the hose, check for holes or clogs in the vacuum hose, ensure the suction hose does not collapse, inspect the Pump Lid O-Ring, clear any blockages in the suction or return pipe, examine the skimmers, vacuum head, and plate, assess pump performance. By addressing these potential issues, you can resolve the suction problem and maintain proper pressure while vacuuming.
How do I maintain proper pool pump performance?
Regularly maintain your pool pump to ensure optimal performance and prevent future issues. Perform routine inspections, clear blockages, replace faulty parts, and address any mechanical problems. Proper maintenance will help maintain pressure and suction during vacuuming.