Last Updated on 3 months by Francis
The Romanian deadlift (RDL) is a highly effective exercise for building the glutes, hamstrings, and other leg muscles. By elevating the heels during the RDL, you can further target the hamstrings and increase the challenge of the exercise. In this article, we will explore the benefits of the heel elevated RDL and provide tips on how to perform it correctly and improve your form.
Contents
Key Takeaways:
- Heel elevated RDL is a hamstring exercise that specifically targets the hamstrings and glutes.
- By elevating the heels, you increase the stretch on the hamstrings and engage them more intensely.
- Heel elevated RDL improves hip mobility, stability, and overall leg function.
- To perform it correctly, maintain a slight bend in your knees, hinge at the hips, and focus on feeling the stretch in your hamstrings.
- Progressions and variations of heel elevated RDL can further challenge your muscles and prevent plateaus.
Why Choose Heel Elevated RDL?

The heel elevated RDL is an excellent choice for hamstring strength training, specifically targeting the hamstrings and glutes. By elevating the heels, you increase the stretch on the hamstrings and engage them more intensely during the exercise. This focused activation can lead to greater gains in hamstring strength and size, helping you achieve your leg goals.
But the benefits of the heel elevated RDL go beyond just building muscle. It also has positive effects on hip mobility and stability. The exercise challenges your balance and coordination, improving overall leg function and reducing the risk of injuries. By incorporating the heel elevated RDL into your training routine, you can enhance your leg strength and performance in various activities such as running and jumping.
Remember, the key to achieving optimal results with the heel elevated RDL is to perform it with proper form and technique. Focus on engaging the right muscles, maintaining a neutral spine, and using a challenging, yet manageable, weight. Consistency and progressive overload will be key to continuously improving your strength and achieving your leg goals.
Let’s explore how to perform the heel elevated RDL correctly in the next section.
How to Perform Heel Elevated RDL Correctly
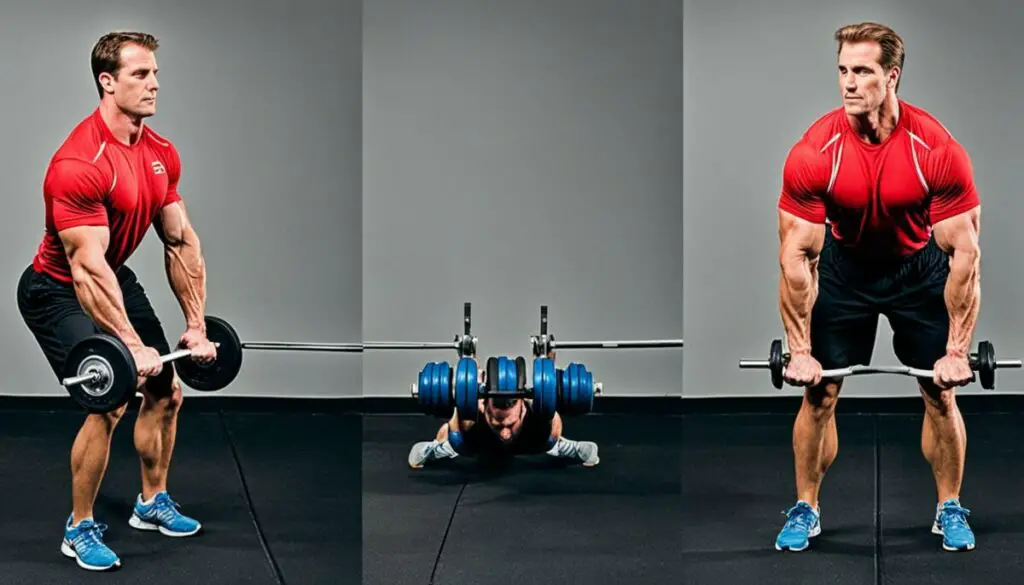
To get the most out of your heel elevated RDL, it’s important to perform the exercise with proper technique. Follow these steps to ensure you’re executing the movement correctly:
- Start by standing with your feet slightly wider than hip-width apart, toes facing forward. This stance will provide stability and help you maintain balance throughout the exercise.
- Hold a barbell or dumbbells in front of your thighs, near your hips. This will be your starting position.
- Engage your core and maintain a slight bend in your knees. This will help you maintain control throughout the movement.
- Hinge at the hips, pushing your hips back as you lower the weight(s) towards the ground. Focus on keeping your weight in your heels and feeling a stretch in your hamstrings.
- Throughout the movement, keep your back straight and shoulders pulled back. Avoid rounding your back or letting your shoulders slump forward.
- Drive through your heels and squeeze your glutes to return to the starting position. Imagine pushing the ground away from you as you stand up.
- Repeat the movement for the desired number of reps, maintaining proper form and control throughout.
Remember, it’s important to maintain a slow and controlled tempo during the heel elevated RDL. Focus on feeling the stretch in your hamstrings and engaging your glutes throughout the movement. If you’re unsure about your form, consider working with a qualified fitness professional who can provide guidance and ensure you’re performing the exercise correctly.
Proper form is key to maximizing the benefits of the heel elevated RDL and reducing the risk of injury. By following these steps, you can perform the exercise with confidence and effectiveness.
Common Mistakes to Avoid
When performing the heel elevated RDL, there are some common form mistakes that you should avoid. These include bending your knees too much, letting the weights touch the floor between reps, arching your back, holding the weights too far from your legs, and using too heavy of a load without proper strength and form.
By being aware of these common mistakes and focusing on proper form, you can optimize your heel elevated RDL and minimize the risk of injury.
Common Mistakes to Avoid
When performing the heel elevated RDL, it’s important to be mindful of common form mistakes that can hinder your progress and increase the risk of injury. Avoiding these errors will help you optimize your form and maximize the benefits of the exercise.
Bending your knees too much
One of the common mistakes in the heel elevated RDL is bending your knees excessively. While there should be a slight knee bend, keeping it moderate ensures that the primary focus remains on the hamstrings and glutes.
Letting the weights touch the floor between reps
Allowing the weights to touch the floor between reps can disrupt the flow of the exercise and reduce its effectiveness. Instead, aim to stop the weights at mid-shin level, maintaining tension on the muscles throughout the set.
Arching your back
Arching your back during the heel elevated RDL puts unnecessary stress on your spine and decreases the engagement of your target muscles. Focus on maintaining a neutral spine position, keeping your core engaged and your back straight throughout the movement.
Holding the weights too far from your legs
Another mistake to avoid is holding the weights too far from your legs. This can compromise your form and reduce the effectiveness of the exercise. Keep the weights close to your legs as you perform the movement, ensuring optimal muscle activation.
Using too heavy of a load without proper strength and form
Attempting to lift heavier weights without building sufficient strength and mastering proper form can increase the risk of injury. It’s crucial to start with lighter weights and gradually increase the load as you develop strength and improve your technique.
To recap, when performing the heel elevated RDL, avoid bending your knees too much, letting the weights touch the floor, arching your back, holding the weights far from your legs, and using too heavy of a load without proper strength and form. By focusing on maintaining proper form and avoiding these common mistakes, you can ensure optimal muscle engagement and reduce the risk of injury.
Progressions and Variations of Heel Elevated RDL

Once you have mastered the basic heel elevated RDL, it’s time to up the ante and take your leg gains to the next level. Incorporating variations into your routine can help prevent plateaus, target different muscles, and provide a new stimulus for muscle growth and strength development.
Here are some exciting progressions and variations of the heel elevated RDL to add variety and challenge to your workouts:
- Equipment variations: Instead of using a barbell, try using dumbbells, kettlebells, or sandbags. These equipment variations can activate your muscles in different ways and add an extra challenge to your workout.
- Tempo changes: Altering the tempo of your heel elevated RDL can provide a unique training stimulus. Slow down the eccentric (lowering) phase or the concentric (lifting) phase to increase time under tension and challenge your muscles.
- Band resistance: Incorporate resistance bands into your heel elevated RDL to increase the intensity and activate more muscles. Attach the bands to the barbell or hold them in your hands for added resistance.
- Single-leg variations: Another way to intensify the heel elevated RDL is to perform it on a single leg. This variation requires greater balance and stability, engaging your muscles more effectively and giving your legs a serious workout.
By incorporating these variations into your training routine, you can keep your workouts dynamic and challenging, while continuously pushing your muscles to new heights.
Programming Considerations for Heel Elevated RDL

When incorporating the heel elevated RDL into your training routine, it’s important to consider your specific goals and training focus. Whether you’re aiming for muscular endurance and hypertrophy or working on strength and power development, tailoring your programming will optimize your results. Here are some programming considerations to keep in mind:
- Reps and Sets: For muscular endurance and hypertrophy, start with 2-4 sets of 10-20 reps. This higher volume will stimulate muscle growth and promote endurance. On the other hand, if you’re focusing on strength and power development, go for 4-6 sets of 3-6 reps. This lower volume and higher intensity will promote strength gains and power production.
- Rest Periods: When training for muscular endurance and hypertrophy, minimize rest periods between sets. Aim for minimal rest (30-60 seconds) to keep your muscles under tension and maximize metabolic stress. For strength and power development, longer rest periods (90 seconds to 3 minutes) allow for better recovery and higher intensity in each set.
- Volume and Intensity: Varying the volume and intensity of your heel elevated RDL workouts can keep your muscles guessing and prevent stagnation. Consider implementing periodization techniques such as progressive overload, where you gradually increase the weight or resistance over time, or alternating between high-volume and low-volume weeks.
- Frequency: To ensure adequate recovery, it’s recommended to include heel elevated RDLs in your training routine 1-2 times per week. This frequency allows for sufficient stimulus without overtaxing the muscles and joints.
Remember, proper programming ensures that you’re challenging your muscles effectively while allowing for adequate rest and recovery. By customizing your training plan based on your goals and focusing on these programming considerations, you’ll maximize the benefits of the heel elevated RDL in your fitness journey.
Benefits of Heel Elevated RDL
The heel elevated RDL offers numerous benefits for leg training, specifically targeting the hamstrings and glutes. Here are the key benefits:
1. Elevated RDL Benefits
- Increased hamstring strength and hypertrophy: The heel elevated RDL places greater emphasis on the hamstrings, allowing for greater activation and muscle growth.
- Enhanced glute development: Along with targeting the hamstrings, the exercise also engages the glute muscles, leading to improved shape and strength in the buttocks.
- Better hip mobility and stability: Performing the heel elevated RDL requires a greater range of motion in the hips, promoting flexibility and stability in this joint.
2. Hamstring Exercise Benefits
- Improved leg function: Strengthening the hamstrings through the heel elevated RDL can enhance performance in various activities like running, jumping, and sports that involve powerful leg movements.
- Reduced risk of hamstring injuries: By targeting and strengthening the hamstrings, this exercise helps prevent common hamstring injuries such as strains or pulls.
3. Glute Exercise Benefits
- Enhanced posterior chain development: The heel elevated RDL recruits the glutes as primary movers, contributing to overall posterior chain strength and stability.
- Improved posture: Strengthening the glutes can help correct posture imbalances, reducing the risk of lower back pain and improving overall posture.
With its focus on hamstring and glute activation, the heel elevated RDL provides unique benefits that can complement your leg training routine and help you achieve your fitness goals.
Image: The heel elevated RDL offers various benefits for leg training, including improved hamstring strength, enhanced glute development, and better hip mobility and stability.
Tips for Improving Heel Elevated RDL Form
To optimize your performance and maximize the benefits of the heel elevated RDL, it’s crucial to focus on maintaining proper form throughout the exercise. Follow these tips to improve your technique and enhance your RDL form:
- 1. Maintain a neutral spine: Keep your back straight and avoid rounding or arching. Engage your core to stabilize your spine throughout the movement.
- 2. Engage your core: Activate your abdominal muscles to provide stability and support during the RDL. This will help maintain a strong and controlled movement.
- 3. Keep your shoulders pulled back: Retract your shoulder blades and keep your shoulders in a stable position. This promotes correct upper body alignment and prevents rounding of the shoulders.
- 4. Keep the bar close to your body: Maintain minimal space between the bar and your legs throughout the entire movement. This ensures that your hamstrings and glutes are effectively engaged.
- 5. Claw the ground with your feet: Focus on gripping the floor with your toes, creating tension and activating the muscles of your feet, which translates to improved stability and overall RDL performance.
- 6. Maintain a soft knee bend: Avoid fully locking out your knees at the top of the movement. Instead, keep a slight bend in your knees to reduce stress on the joint and maintain tension in your hamstrings.
“Proper form is vital for performing the heel elevated RDL effectively and minimizing the risk of injury. By implementing these tips, you can ensure that you’re getting the most out of each rep and providing your muscles with the stimulus they need to grow and strengthen.” (First source)
Visualization Technique for Shoulder and Lat Position
Visualizations can be a powerful tool to improve your RDL technique. One effective visualization is to imagine holding a piece of paper under your armpit. This mental cue helps fix your shoulder and lat position, keeping them stable and engaged throughout the RDL movement. By visualizing this, you can reinforce proper upper body alignment and optimize your form.
Common Mistakes to Avoid
To further enhance your heel elevated RDL form, it’s important to be aware of common mistakes and actively avoid them. Some common errors include:
- 1. Bending your knees too much
- 2. Letting the weights touch the floor between reps
- 3. Arching your back
- 4. Holding the weights too far from your legs
- 5. Using too heavy of a load without proper strength and form
By being mindful of these mistakes and focusing on maintaining proper form, you can make significant improvements in your heel elevated RDL performance and reap the full benefits of this exercise.
| Common Mistakes | Proper Form |
|---|---|
| Bending knees excessively | Maintaining a slight knee bend |
| Letting weights touch the floor between reps | Stopping the weights at mid-shin level |
| Arching back | Keeping a neutral spine |
| Holding weights far from legs | Keeping the weights close to your legs |
| Using too heavy of a load without proper form | Starting with lighter weights and gradually increasing |
Conclusion
The heel elevated RDL is a highly effective exercise for building strength, size, and mobility in your hamstrings, glutes, and other leg muscles. By following proper form and incorporating variations and progressions, you can continuously challenge your muscles and achieve optimal leg gains.
This exercise specifically targets the hamstrings and glutes, helping to develop strength and size in these muscles. It also improves hip mobility, stability, and balance, enhancing overall leg function and performance in various activities. Additionally, the heel elevated RDL strengthens the lower back and lats, improving posture and reducing the risk of back pain.
Remember to program the heel elevated RDL according to your specific goals. Whether you aim for muscular endurance and hypertrophy or strength and power development, adjust the sets, reps, and rest periods accordingly. Focus on improving your form over time by maintaining a neutral spine, engaging your core, and keeping your shoulders pulled back throughout the movement.
With consistent practice and implementation of the heel elevated RDL, you can unlock your full leg potential and enhance your overall leg function. Take advantage of this highly effective exercise to build strength, size, and mobility in your leg muscles, and enjoy the benefits it brings to your fitness journey.
FAQ
What muscles does the heel elevated RDL target?
The heel elevated RDL specifically targets the hamstrings and glutes, helping to build strength and size in these muscles. It also strengthens the lower back and lats, improving posture and reducing the risk of back pain.
How do I perform the heel elevated RDL correctly?
To perform the heel elevated RDL correctly, stand with your feet slightly wider than hip-width apart, toes facing forward. Hold a barbell or dumbbells in front of your thighs, near your hips. Engage your core, maintain a slight bend in your knees, and hinge at the hips, pushing your hips back as you lower the weight(s) towards the ground. Keep your weight in your heels, feel a stretch in your hamstrings, and maintain a straight back and pulled-back shoulders throughout the movement. Drive through your heels and squeeze your glutes to return to the starting position.
What are some common mistakes to avoid when performing the heel elevated RDL?
Common mistakes to avoid include bending your knees too much, letting the weights touch the floor between reps, arching your back, holding the weights too far from your legs, and using too heavy of a load without proper strength and form. To ensure proper form, focus on maintaining a slight knee bend, stopping the weights at mid-shin level, keeping a neutral spine, keeping the weights close to your legs, and starting with lighter weights to build strength gradually.
Are there variations of the heel elevated RDL?
Yes, there are several variations of the heel elevated RDL that you can incorporate to challenge your muscles and prevent plateaus. Some variations include using different types of equipment (dumbbells, kettlebells, sandbags), changing the tempo, incorporating band resistance, and performing single-leg variations. These variations target different muscles, increase the intensity, and provide a new stimulus for muscle growth and strength development.
How should I program the heel elevated RDL into my training routine?
The programming of the heel elevated RDL depends on your specific goals. For muscular endurance and hypertrophy, start with 2-4 sets of 10-20 reps, with minimal rest between sets. For strength and power development, start with 4-6 sets of 3-6 reps, resting for 90 seconds to 3 minutes between sets. Vary the volume and intensity over time to continuously challenge your muscles. It is recommended to include heel elevated RDLs in your training routine 1-2 times per week.
What are the benefits of the heel elevated RDL?
The heel elevated RDL offers several benefits, including targeted muscle development in the hamstrings and glutes, improved hip mobility and stability, enhanced leg function for activities like running and jumping, strengthened lower back and lats for better posture, and reduced risk of back pain. Additionally, the exercise helps to build overall leg strength and size.
How can I improve my form in the heel elevated RDL?
To improve your form in the heel elevated RDL, focus on maintaining a neutral spine, engaging your core, and keeping your shoulders pulled back throughout the movement. Use effective cues like keeping the bar close to your body, clawing the ground with your feet, and maintaining a soft knee bend. Consistently practice these tips and cues to enhance your RDL form and maximize the benefits of the exercise.

