Last Updated on 1 year by Francis
Kashering your microwave is an important step in transforming it from a secular appliance into one that meets the requirements of Jewish dietary laws. With the help of this article, you’ll learn how to properly kasher your microwave for use in your kitchen. Let’s get started!
Kashering a microwave is a straightforward process that can be done with simple household items. Here’s what you need to do:
- Unplug the microwave and remove all of the parts that are dishwasher-safe.
- Clean all of the surfaces inside the microwave using mild dish soap and a damp cloth or sponge. Rinse thoroughly.
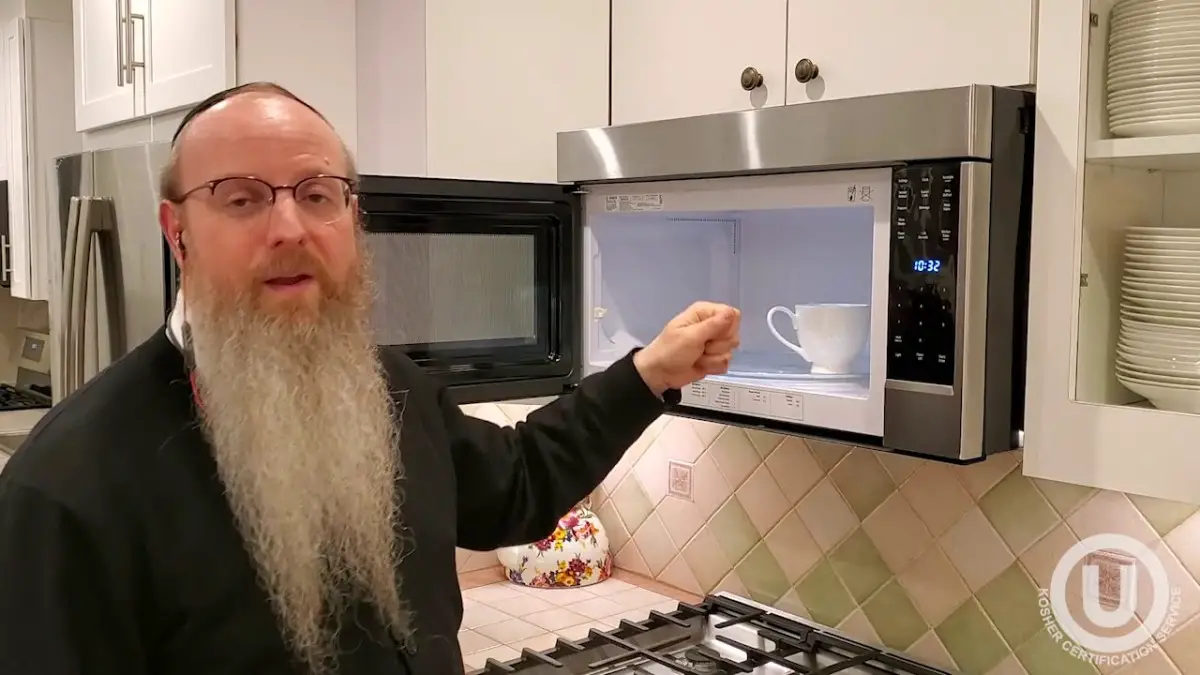
- Fill a large pot with water and bring to a boil. Place a wooden spoon handle in the boiling water to create steam.
- Open the microwave door and quickly wave the steamy spoon handle around the interior of the appliance, holding it as far away from you as possible.
- Allow the interior of the microwave to dry completely before replacing the removable parts.

Contents
Kashering a Microwave: An Overview
Kashering a microwave is a necessary part of the kashering process. This process helps to ensure that the microwave is free of residue that could be considered forbidden foods according to Jewish dietary laws. Through a series of steps, the microwave is kashered and ready for use.
Step 1: Cleaning the Microwave
The first step in the process of kashering a microwave is to clean it thoroughly. This involves using an all-purpose cleaner to wipe down the inside, outside, and all surfaces. It is important to pay special attention to any areas where food may have splattered or spilled. Once the entire microwave has been cleaned, it should be allowed to dry completely before proceeding.
Step 2: Heating the Microwave
The next step in the kashering process is to heat the microwave. This is done by running the microwave on its highest setting for several minutes. This will help to burn off any remaining residue or particles that may have been missed during the cleaning process. It is important to ensure that the microwave is completely dry before heating it and that no flammable materials are present in the unit.
Step 3: Disconnecting the Microwave
Once the microwave has been heated, it should be disconnected from its power source. This is an important step to ensure that no sparks or electrical current is present while the kashering process is being completed. The cord should be removed from the wall and the microwave should not be connected again until the entire kashering process has been completed.
Step 4: Covering the Microwave
The next step in the kashering process is to cover the microwave with a cloth. This cloth should be made of a material that is considered to be “kosher” according to Jewish dietary laws. The cloth should be placed on the inside and outside of the microwave and allowed to remain in place for a period of 24 hours.
Step 5: Finishing the Kashering Process
Once the 24 hour period has passed, the kashering process is complete and the microwave is ready for use. The cloth that was used to cover the microwave should be removed and disposed of properly. It is important to ensure that the microwave is completely dry before it is connected to a power source and used.
Related Faq
What is Kashering?
Kashering is the process of preparing a kitchen and its utensils for use according to Jewish dietary laws. This includes purifying the kitchen and its utensils to make them fit for use with food that follows the laws of kashrut, which is the Jewish dietary law.
What is the Process for Kashering a Microwave?
The process for kashering a microwave involves several steps. First, remove all contents and wash the interior of the microwave with soap and water. Then, remove all racks, trays, and other removable parts, and wash them as well. Next, heat up a pot of water in the microwave on high heat for at least five minutes. Finally, clean the outside of the microwave with a damp cloth and a mild detergent.
What are the Benefits of Kashering a Microwave?
Kashering a microwave offers several benefits. It ensures that the microwave is in line with Jewish dietary laws, allowing it to be used for cooking and preparing kosher foods. This also helps to prevent cooking with non-kosher ingredients and prevents cross-contamination from other foods. Furthermore, it also helps to maintain a clean and hygienic kitchen.
Are There any Drawbacks to Kashering a Microwave?
There are a few drawbacks to kashering a microwave. It can be a time-consuming process, depending on the size and complexity of the microwave. Additionally, some microwaves may be more difficult to kasher than others due to their shape, size, or age. Finally, kashering a microwave requires special care to ensure that it is done correctly and that all surfaces are properly cleaned and heated.
What Should be Done After Kashering a Microwave?
After kashering a microwave, it is important to take certain precautions to ensure that it remains kosher. This includes regularly cleaning the interior and exterior of the microwave with a damp cloth and mild detergent, as well as avoiding cross-contamination from non-kosher foods. Additionally, it is important to avoid using the microwave for any purpose that does not involve kosher food.
Can a Microwave be Kashered More than Once?
Yes, a microwave can be kashered more than once. However, it is important to follow the same steps each time and to take extra care to ensure that all surfaces are thoroughly cleaned and heated. Additionally, it is important to avoid any cross-contamination from non-kosher foods in between kasherings.
Kashering a Microwave
Kashering a microwave is a simple, straightforward process that anyone can do at home. Whether you’re kashering for Pesach, or simply want to ensure that your microwave is ready to be used, following the steps outlined above will ensure that your microwave is kashered properly and safely. With this knowledge, you can now kasher your microwave with confidence and enjoy the convenience and ease of using a microwave in your kosher kitchen.